


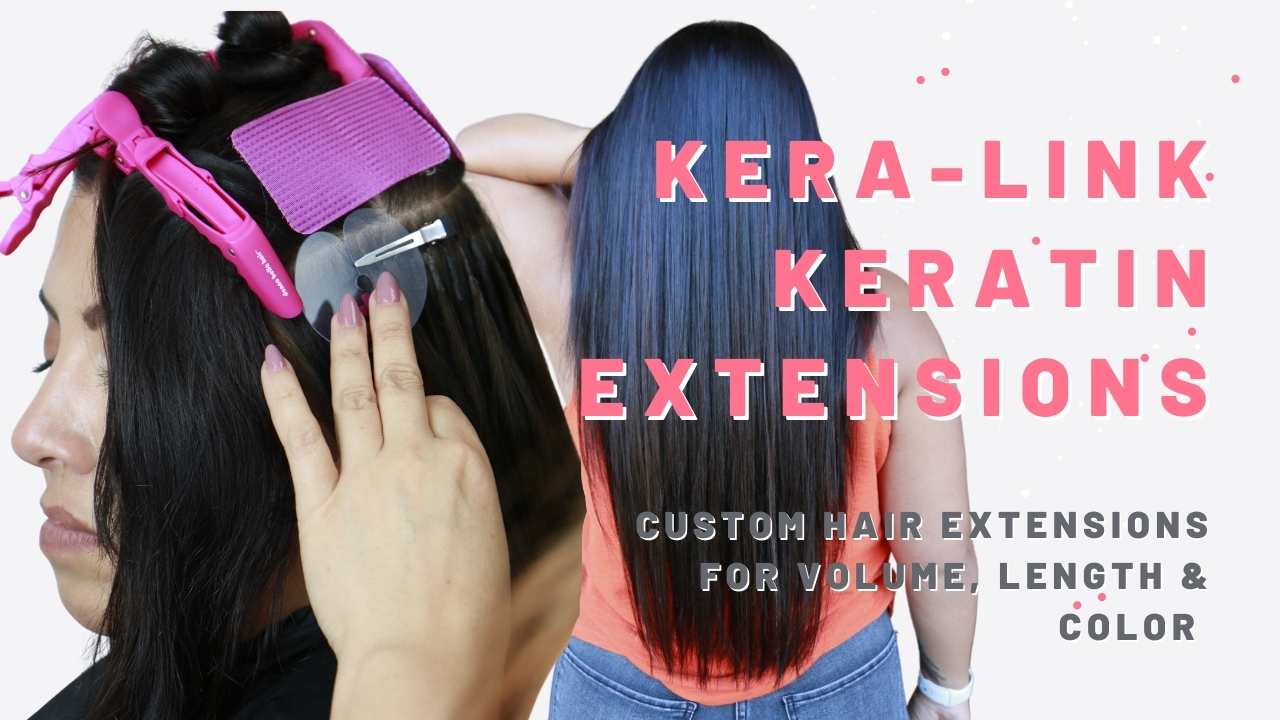
In this video tutorial, I show you everything you need to know about Kera Link Hair Extensions using all Donna Bella Hair!
Hair extensions are supposed to be invisible. But we all know how it goes, sometimes they just aren’t! Lets face it, bulky tape ins or I-Links can be spotted if not taken care of properly. But did you know there is an extensions type that literally is meant to look like your hair, even from the base? Let’s break it down: Kera Link Hair Extensions.
How to Install:
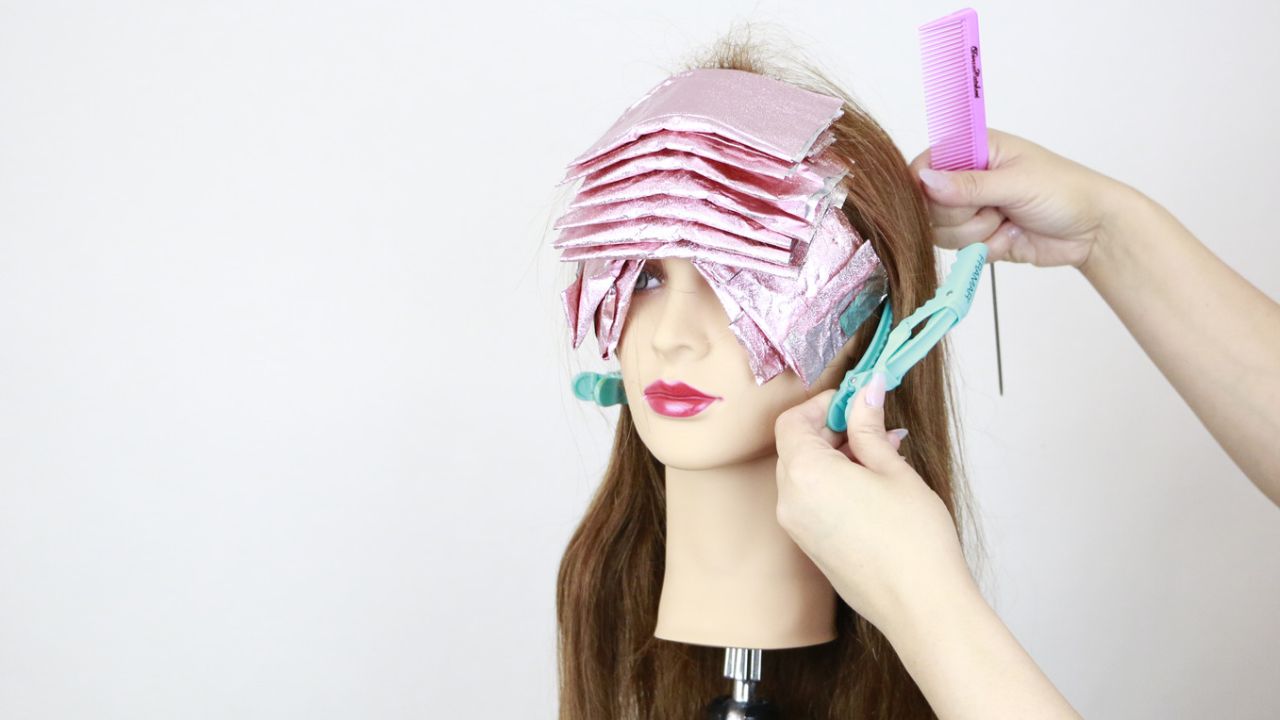
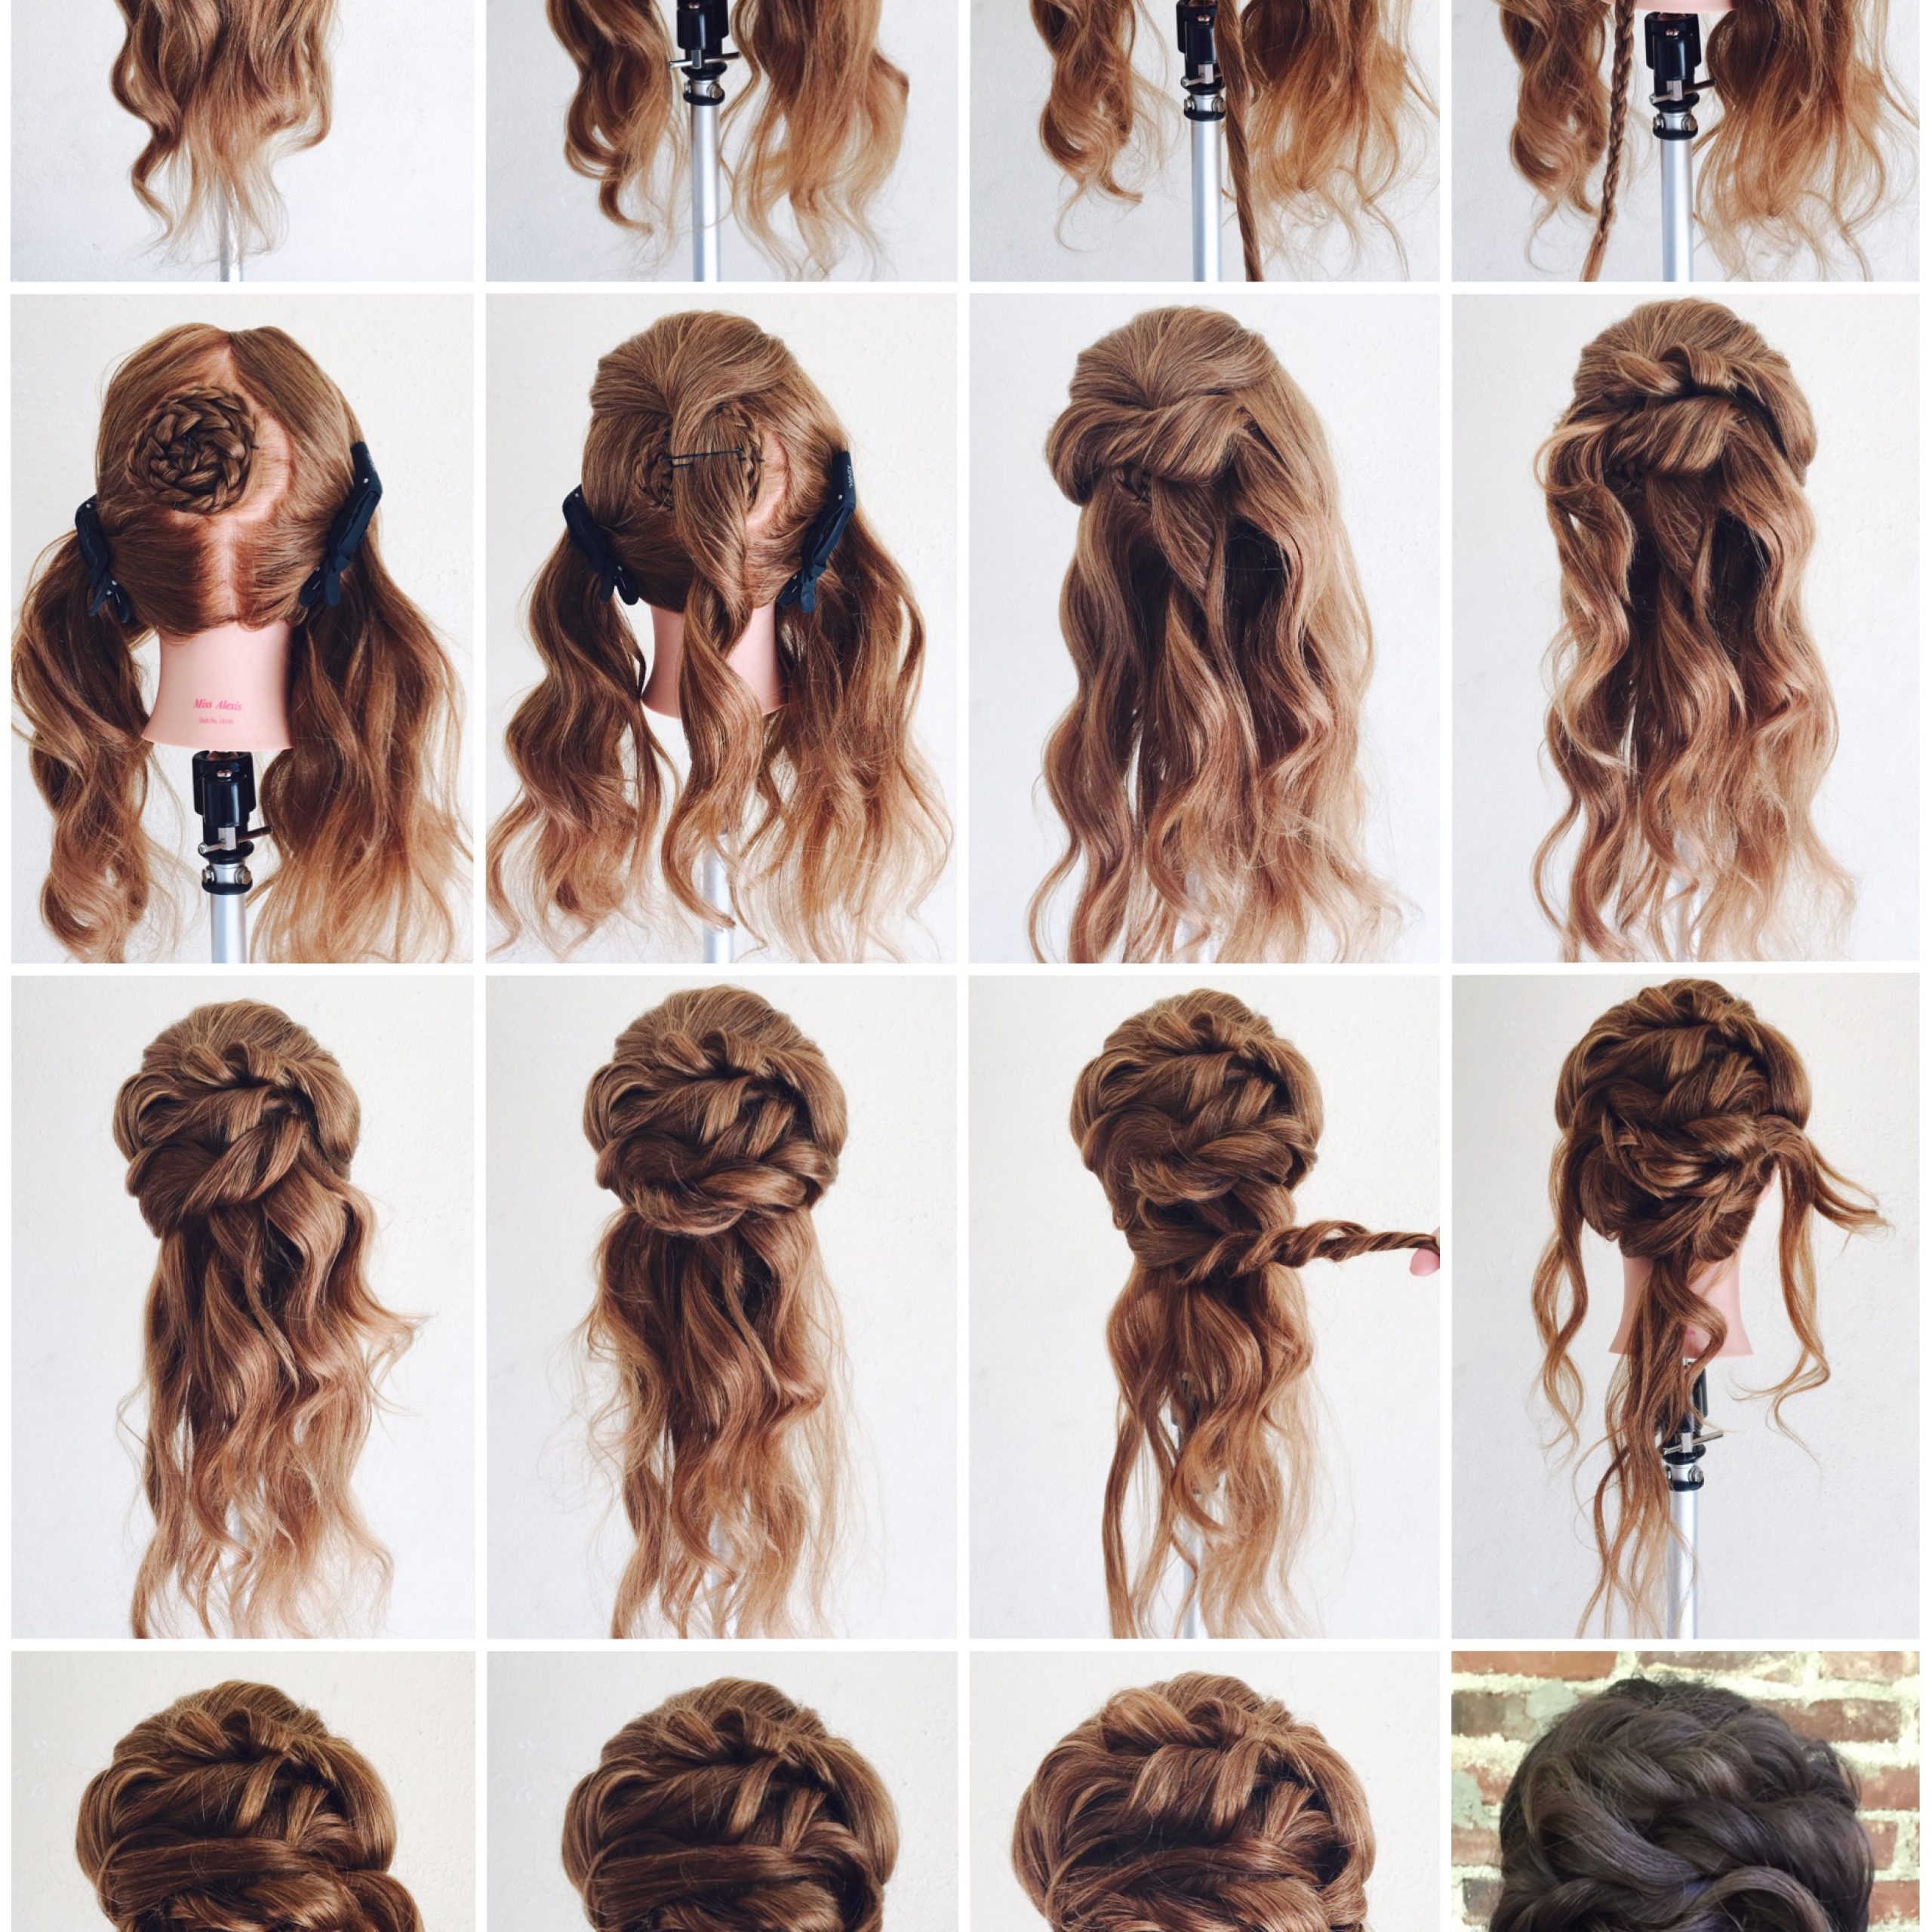
When doing extensions, it’s really important to have nice and clean sections. I like to part my models hair from the apex to just behind her ear, so it is easy to separate from the front and the back. When starting your section, you want to take at least a two finger section from the hairline so the base of the extension is undetected.
This is important because if your client wears their hair up, you can’t see the extensions. This is a general rule of thumb for all extensions.
Pro-Tip: Take the end of your tail comb at the start of the section and lift the hair you left out over it, and you can’t see it, you shouldn’t be able to see the extension.
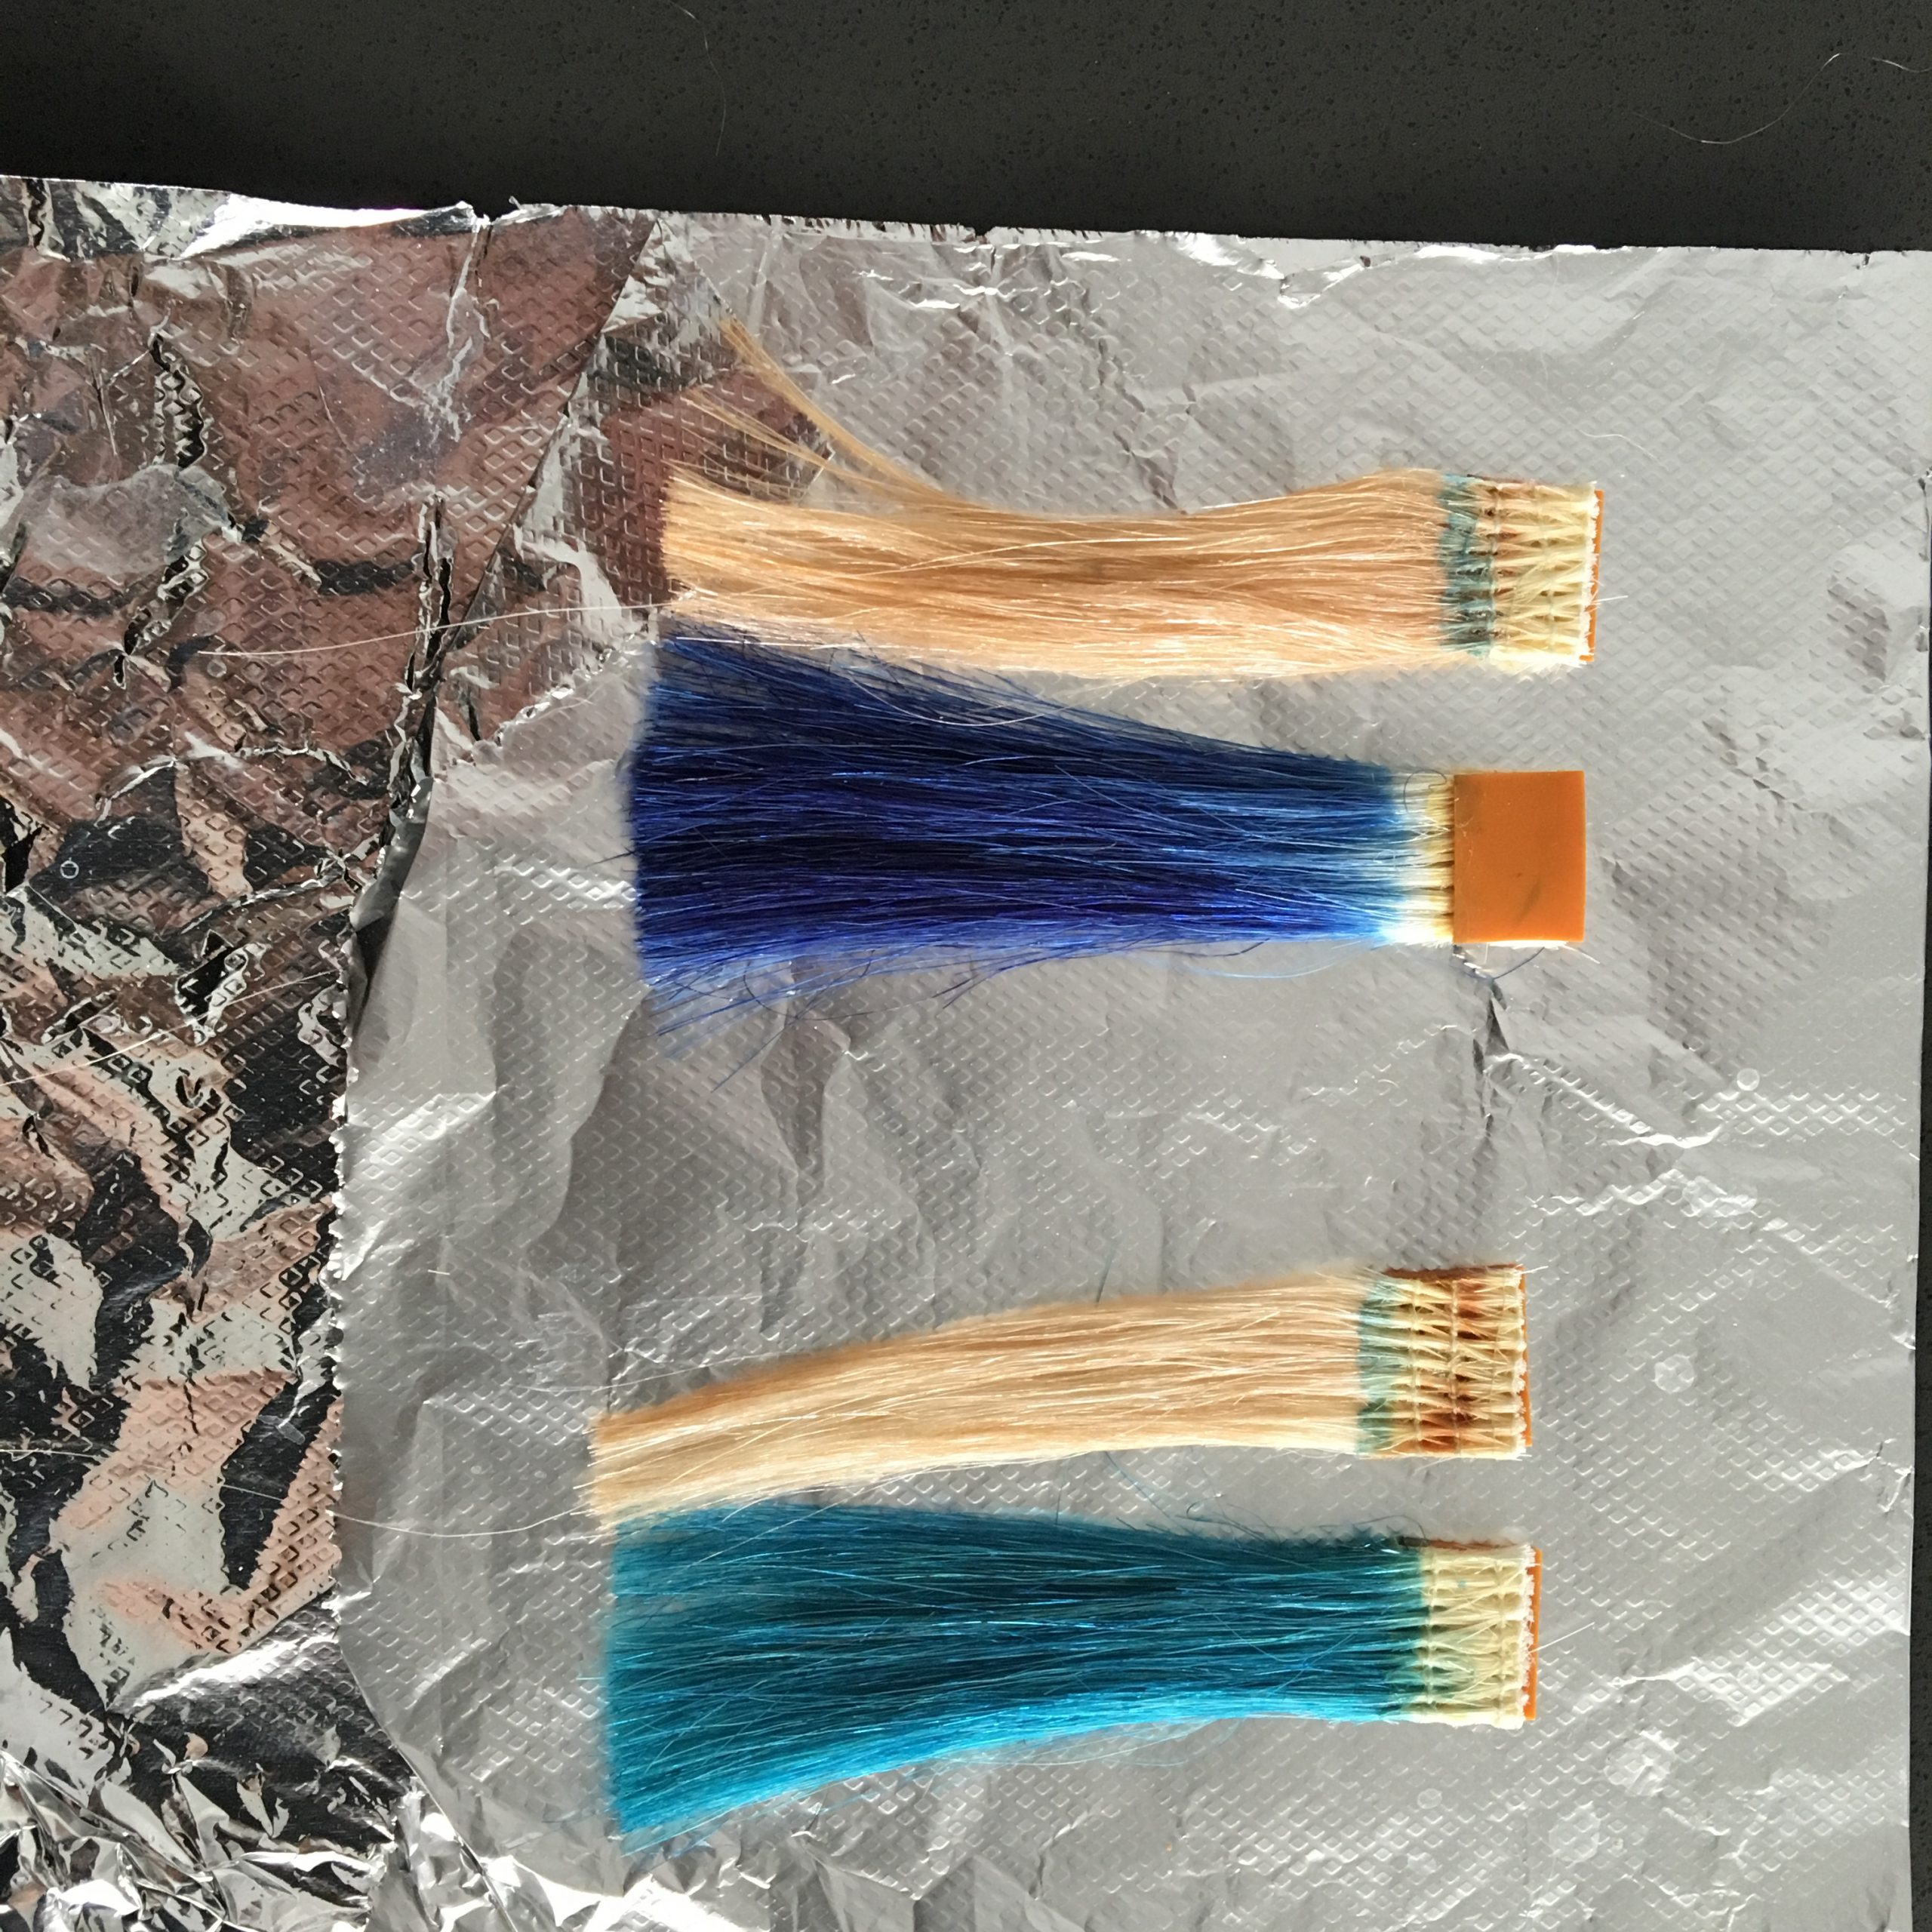
I started at the occipital point on my clients hair, but you can change it based on your clients head shape. When doing Kera Links, you want to take the section the same width as the base of your extension. Essentially, a rectangular section. Keep in mind, I cut the base of my Kera Link in half when I was prepping my extensions.
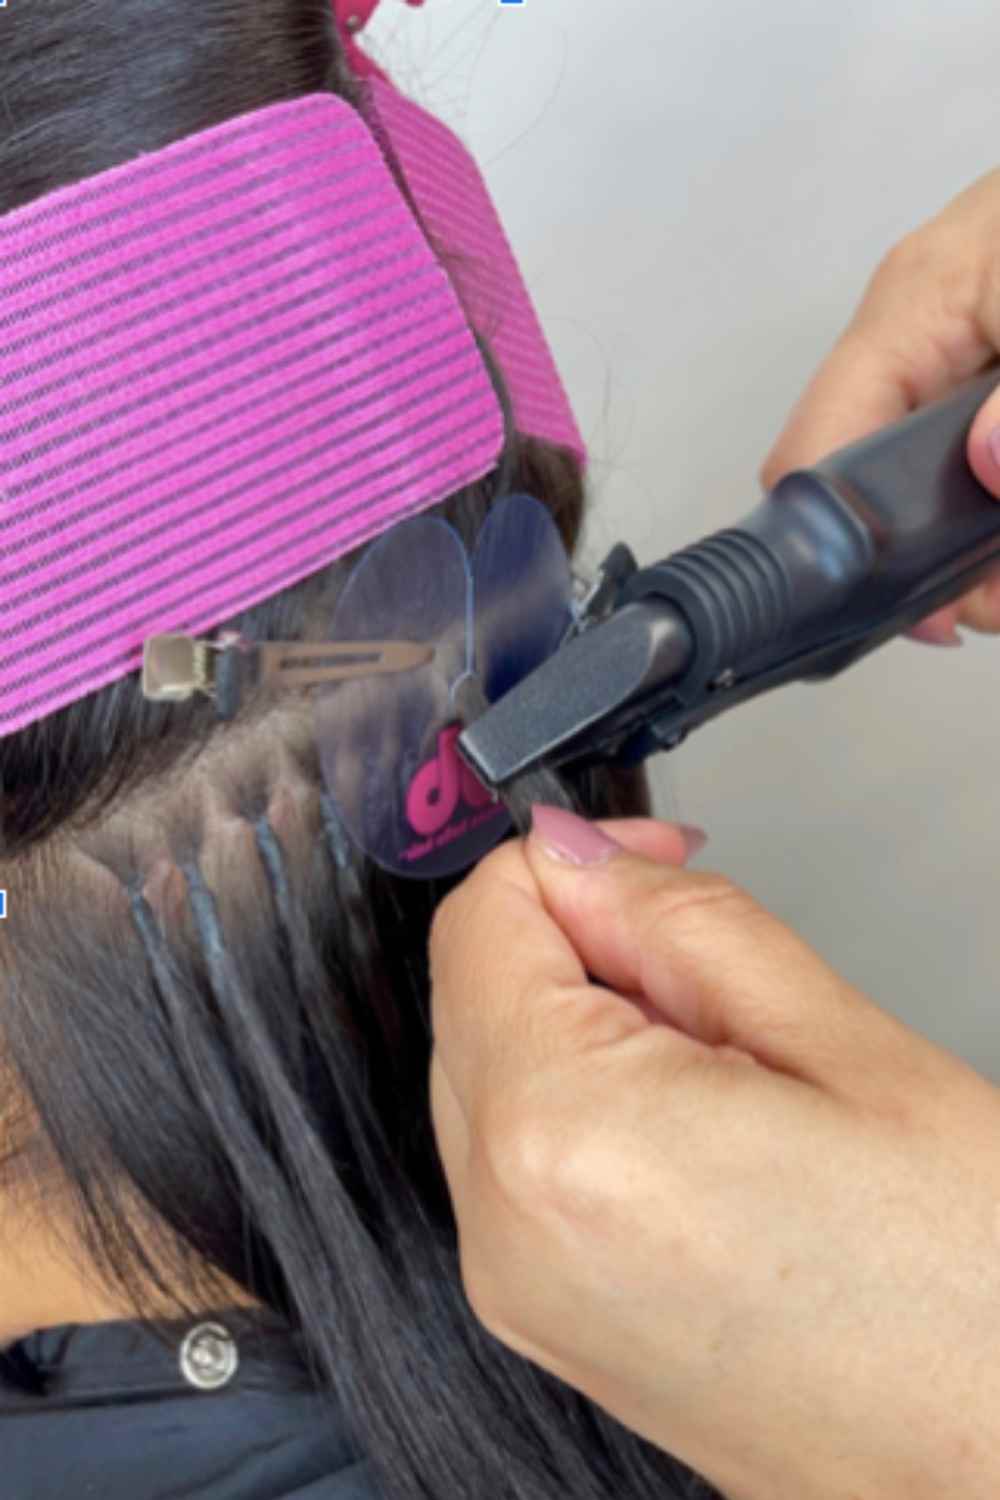
Take your Protective Disk and insert it at the bottom of your rectangular section. You want to make sure that the protective disk is at the base of your section and not higher because it can cause your section to bevel.
0 degree elevation is the goal so the hair falls naturally. This will make the extension a little uncomfortable and could expose the extension. If you are more comfortable, take the Protective Disk and move it slightly lower than the base of your extension.
Once you are comfortable with your placement. Take your melting connector and melt the Kera-Link at its base. You want to start at the bottom of the Keralink and work your way up, sliding it up the extension for about 3 sections.
Be careful, the melting connector is HOT. If you aren’t careful, you can burn your client. Once the keratin is melted, gently roll it with your fingers. This makes the extension relatively invisible against the hair.
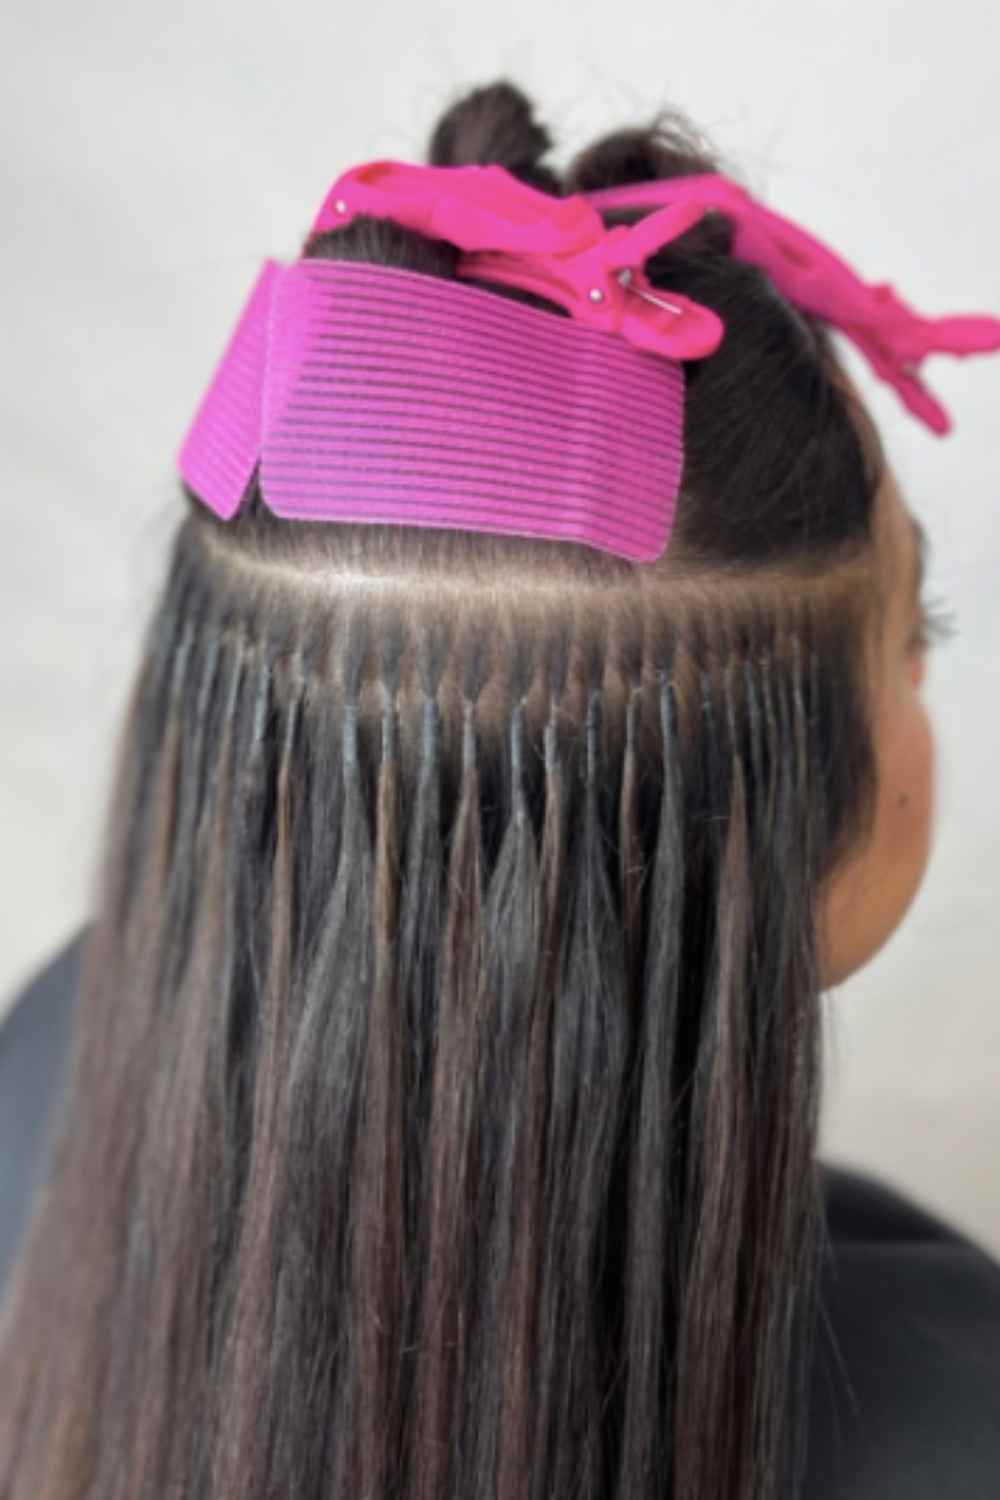
You want to install your Keralinks right next to each other. You DO NOT want any gaps in between your section.
Once the first section is down, I am only going to take about a half inch section above my previous extensions for maximum fullness. In this section, I am continuing the same pattern all throughout the back, while alternating the 1b with the color 2.
The front section is something that is completely customizable for each client. For my model in this video, I cut my Keralinks into thirds at the base. What is super cool about the Kera Link extensions is that the smaller you cut them, the less detectable they are. This method is great for clients with thin or thinning hair because of that reason.
You still want to keep in mind that you want the section of you hair to be the width of the extension, so around the face, her sections are super tiny! You still want to have back to back sections. On my very last section up top, I cut all of my Kera links in halves, still cutting the ones around her face into thirds.
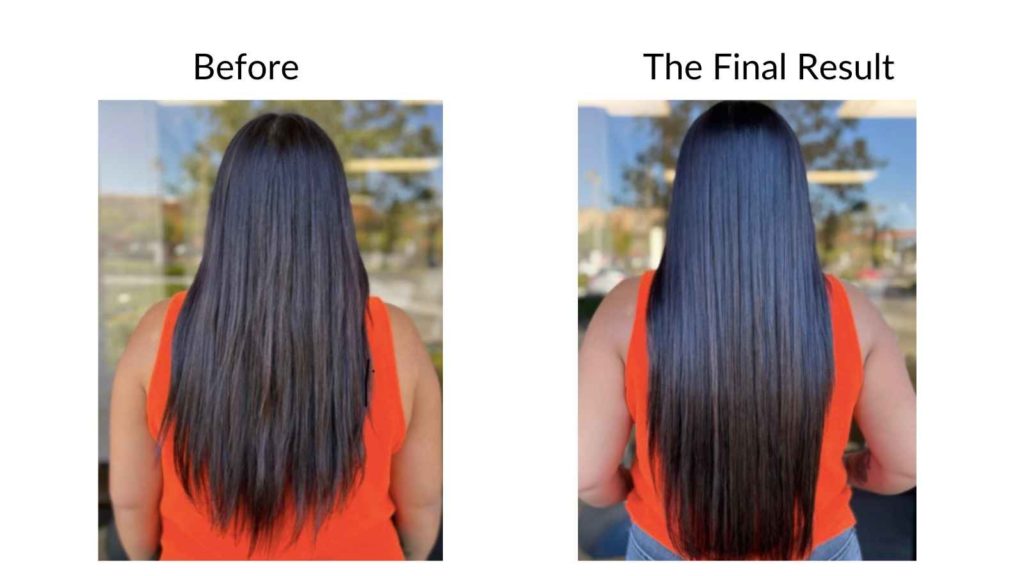
Once all of your extensions are applied, you need to cut and style. One thing I like to do is do a clear gloss or toner on my extensions to fully blend the hairs natural texture before cutting. Sometimes it looks like it won’t blend, but by wetting down the hair and smoothing the cuticle it will help the hair blend better and you may not have to cut as much.
How to take care of them
- Use sulfate-free products to wash & condition the hair.
- Avoid slippage by applying shampoos and treatments from the middle of the hair down.
- Air dry when possible, and avoid heat. If you need to straighten or curl, use a heat protectant.
- Brush hair only when dry, from the bottom up, and use leave-in conditioners.
- For up-dos, braids, and buns, keep them loose to avoid tugging too hard on the extension.

You want to make sure to schedule your removal and reinstall every 4-8 weeks depending on your hair type. If you have fine to medium hair, every 6-8 weeks is okay. For those who have thinning hair, every 4-6 weeks is recommended.
What type of client is best for this type of extension?
Believe it or not Keratin Link extensions are perfect for thin, fine or even clients that are balding. When done properly, Kera-Links extensions create zero damage on the hair. As mentioned, they are so customizable that you can blend them with ease.
They are also great for clients with short hair that want to skep the pesky grow out phase!
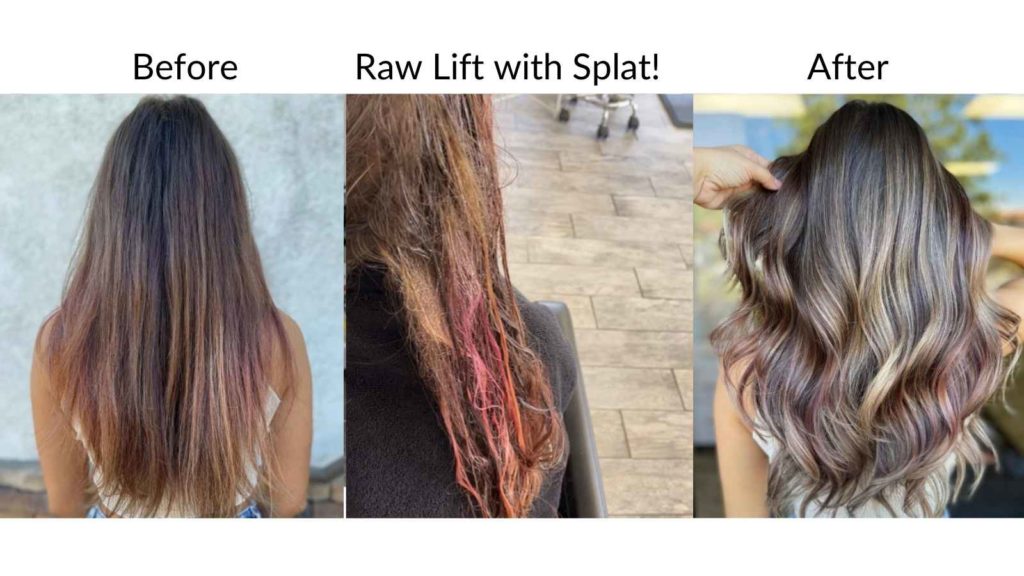
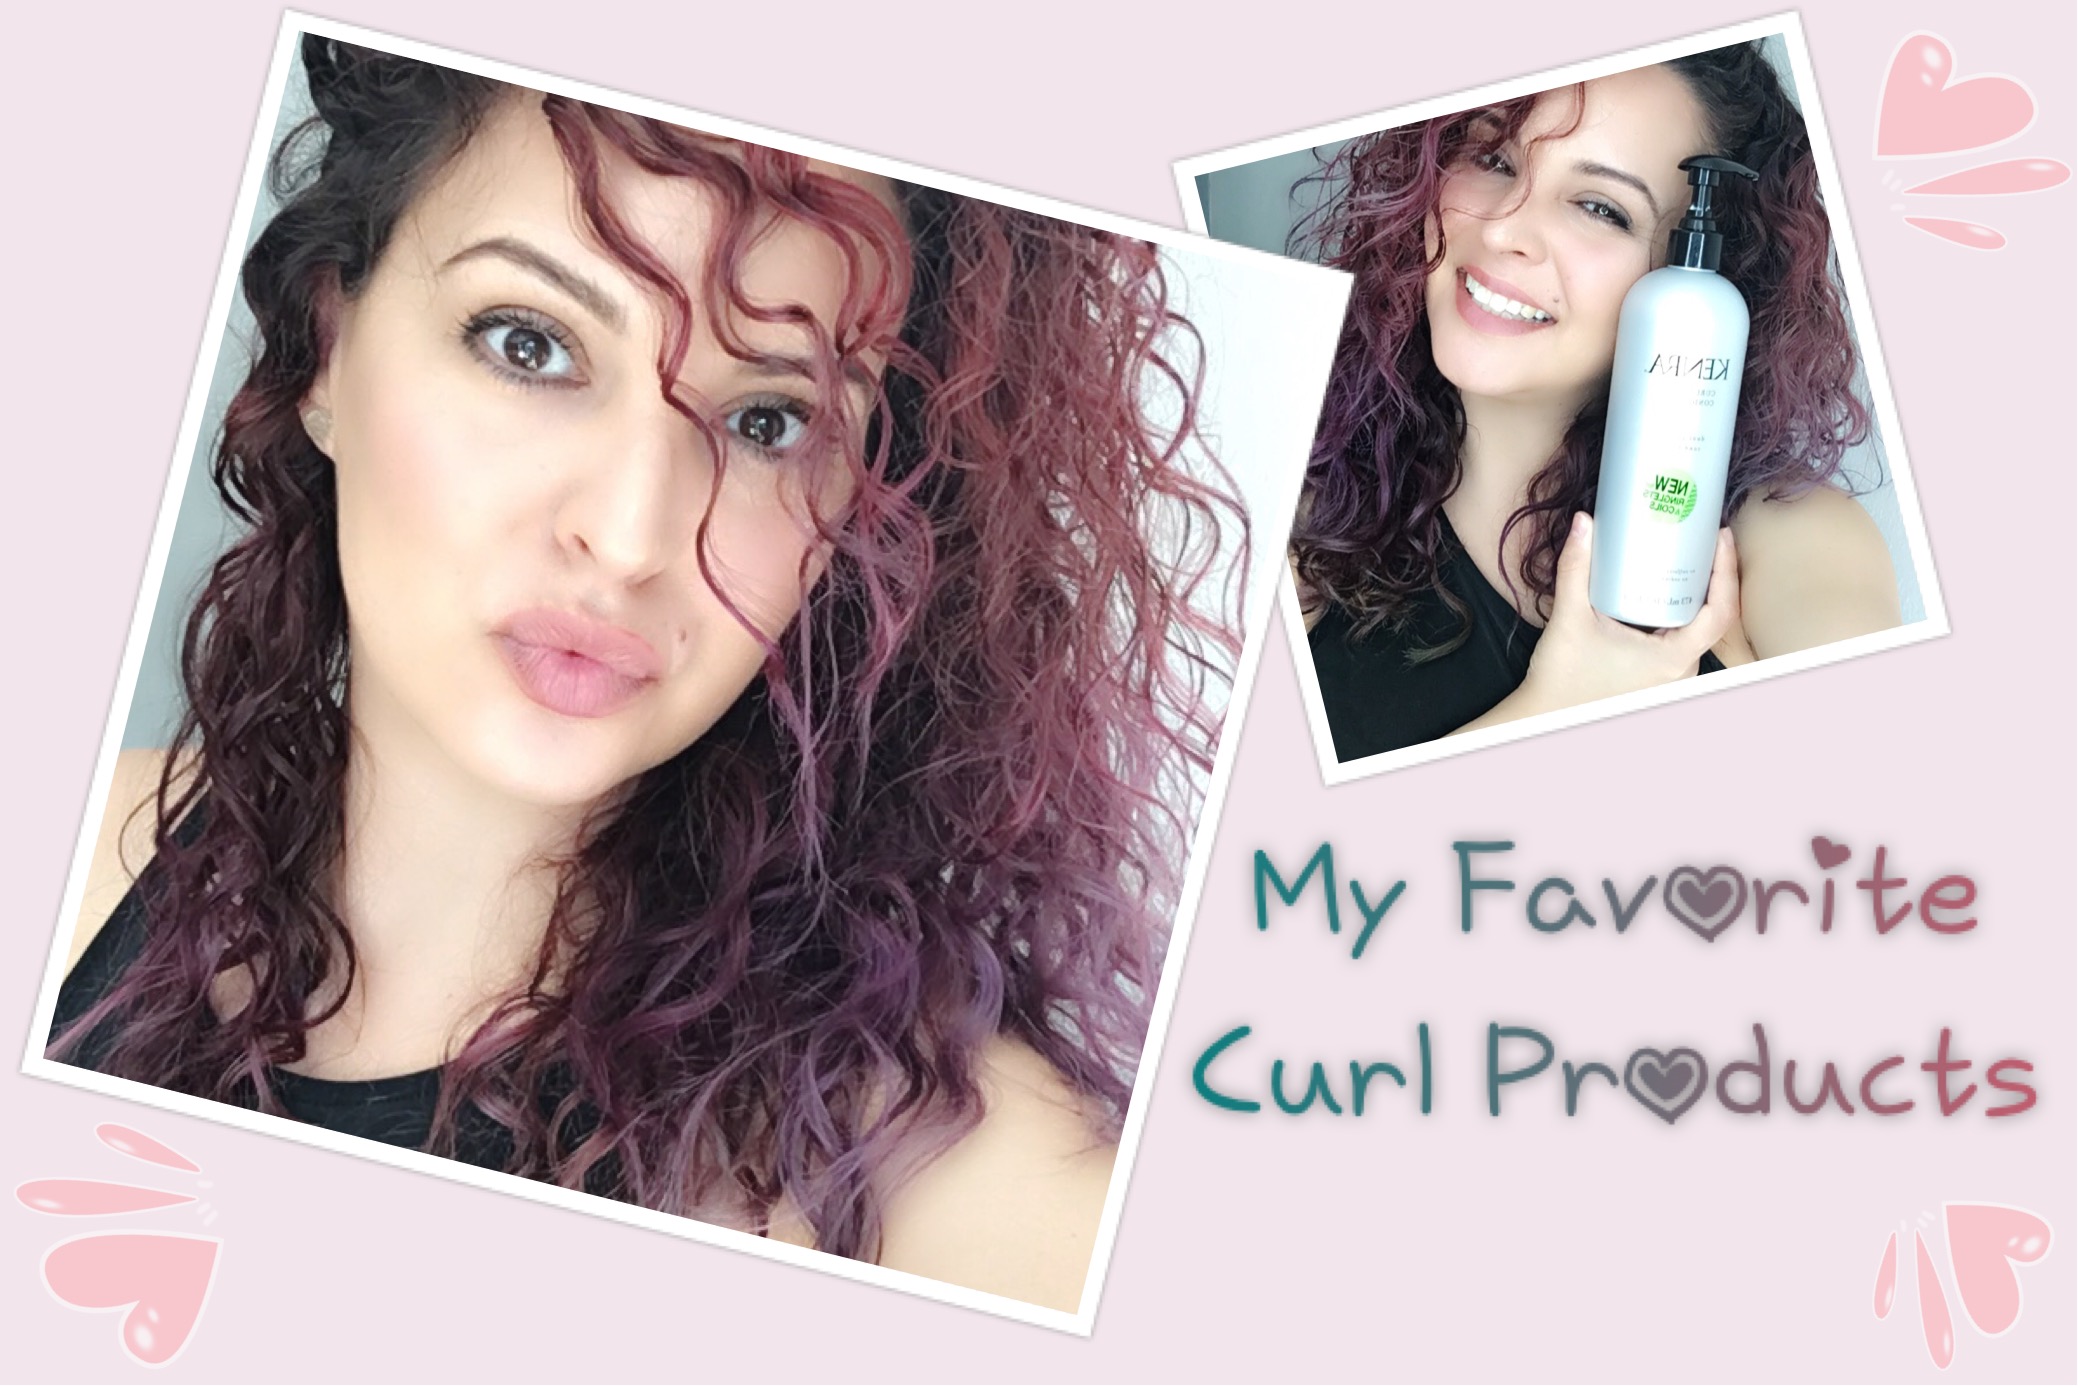
Do you ever see a canvas and you’re just like ugh, I want to make you so blonde! And then you do a beautiful teasylight, check her foils and you see bright PINK? Cuz that’s what happened to me! In this color correction from pink to blonde, watch how I take my client’s red box dyed hair to a beautiful blonde using all Kenra Color!