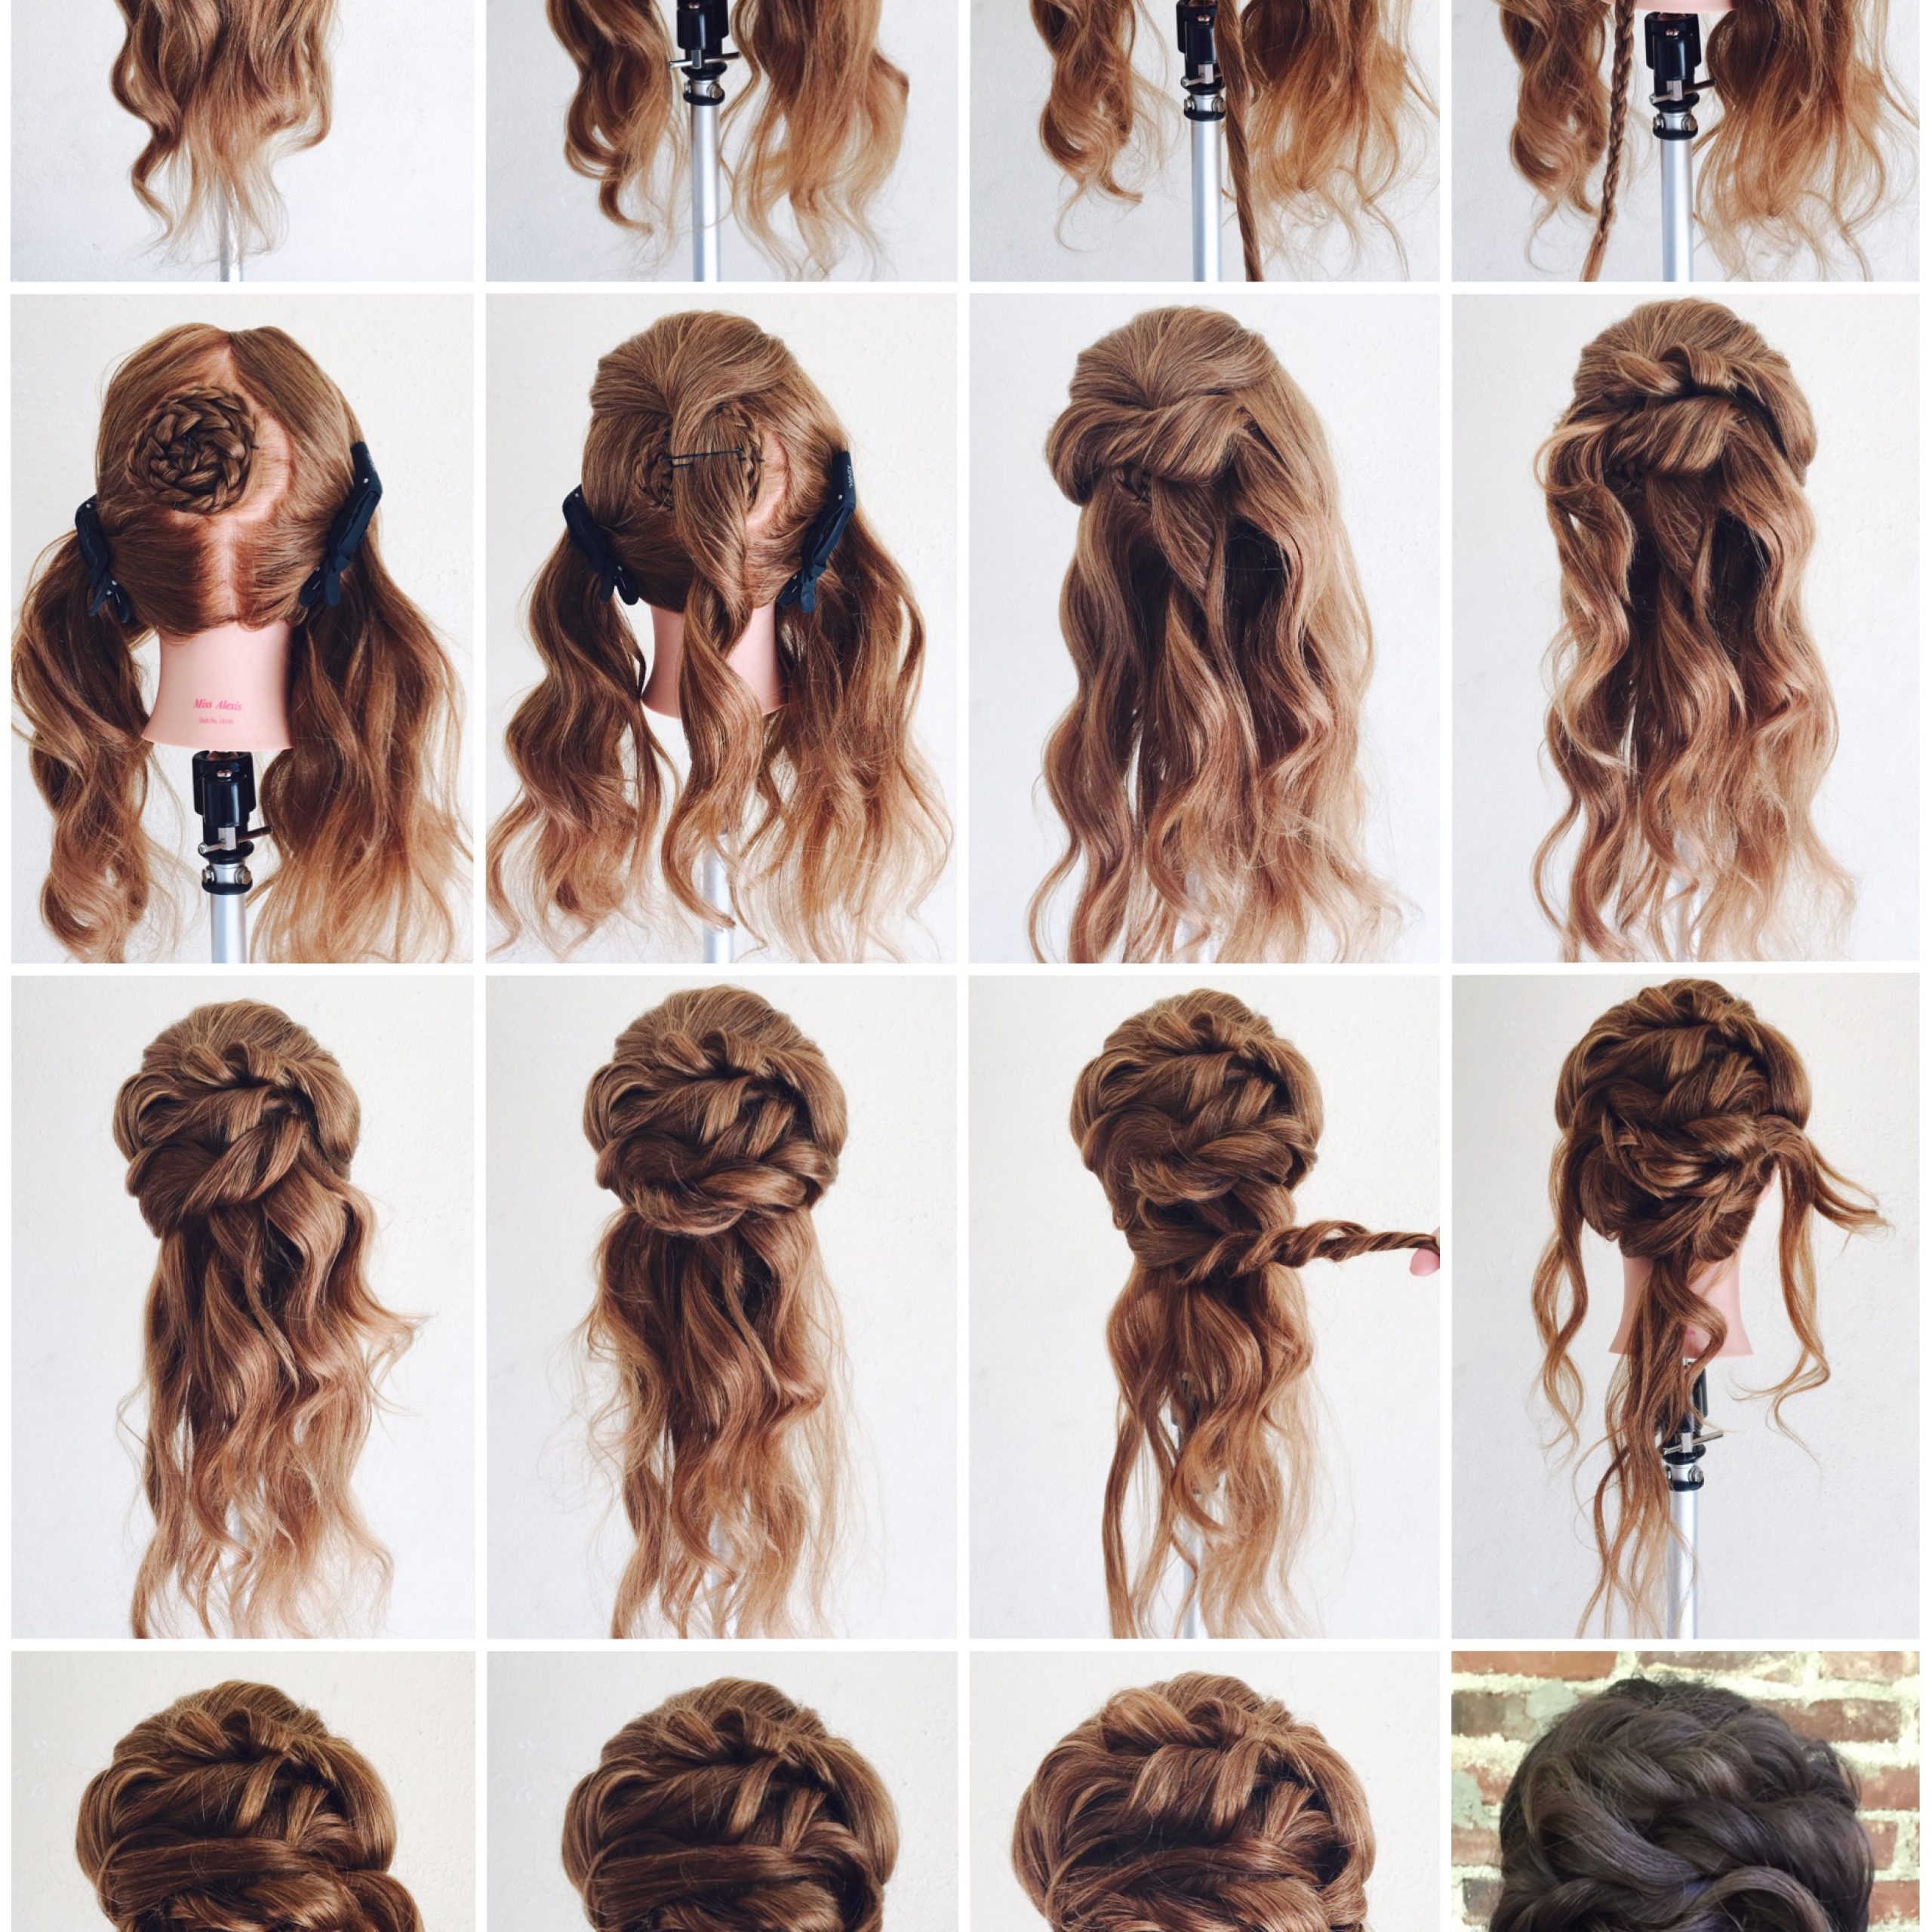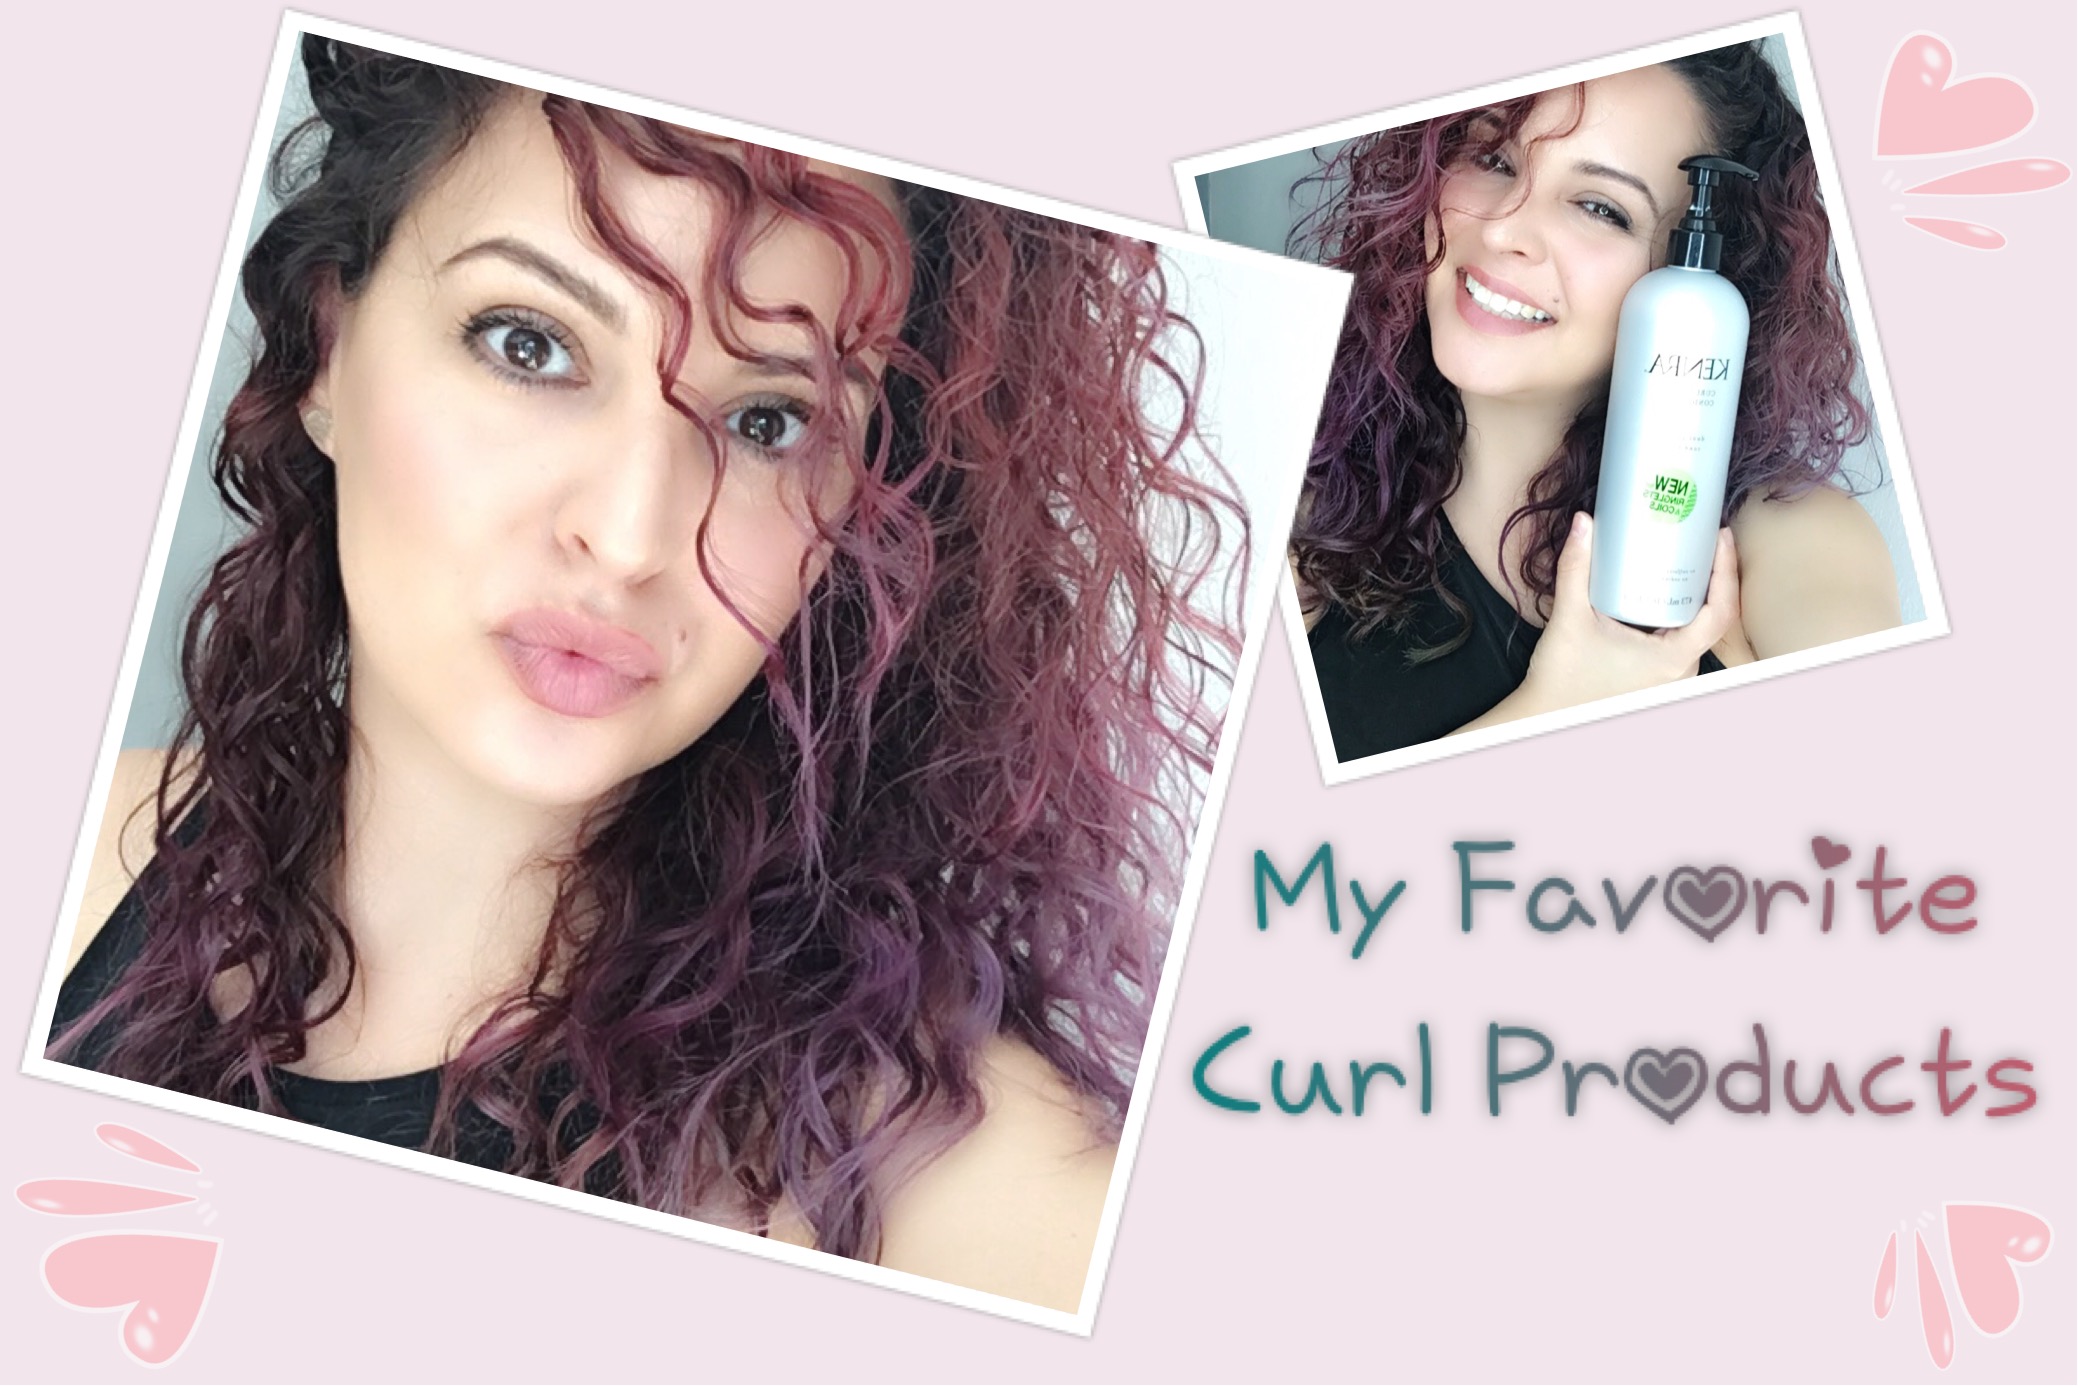


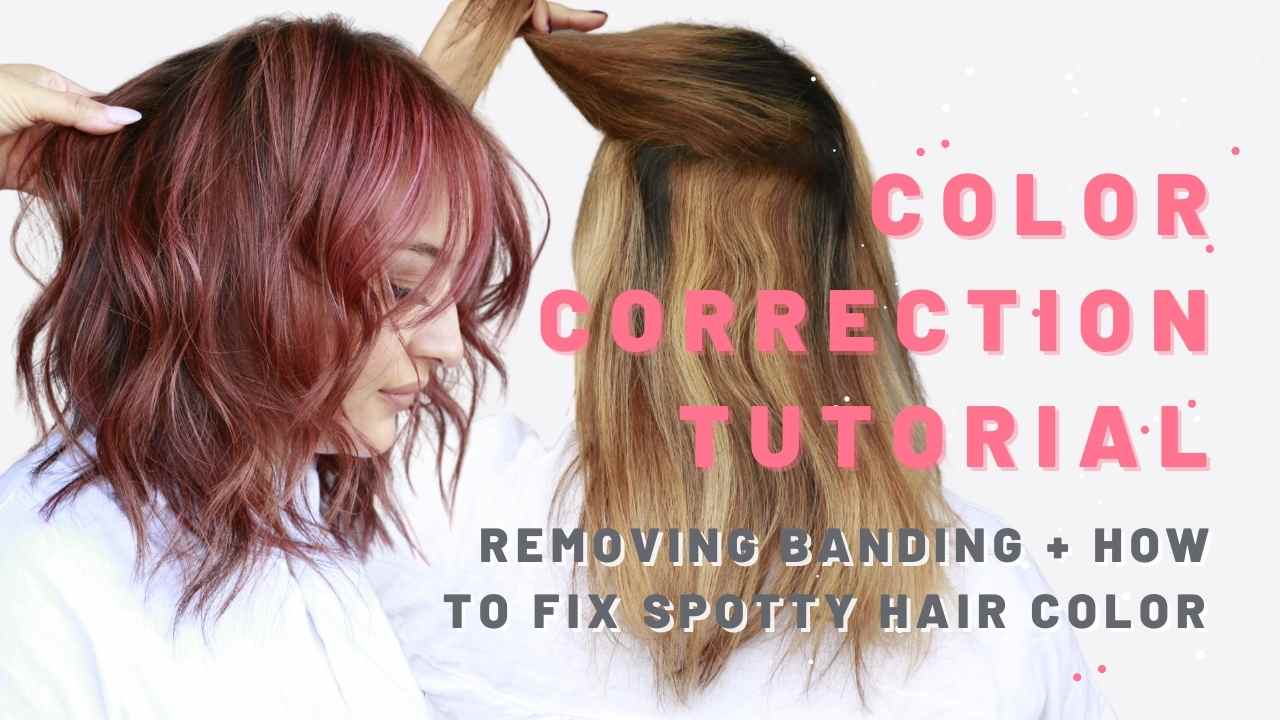
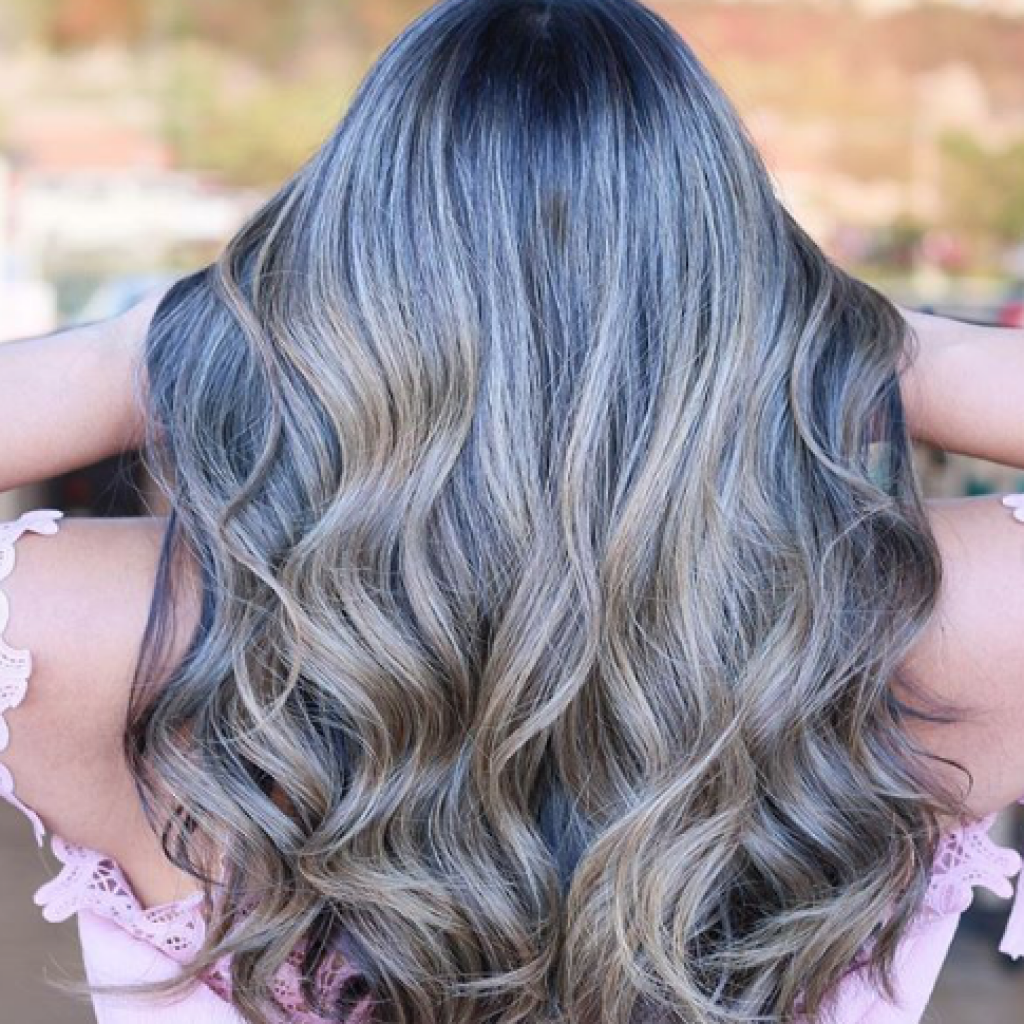
In this hair color correction tutorial, I am going to show you how I create this rose copper look using all Kenra Color.

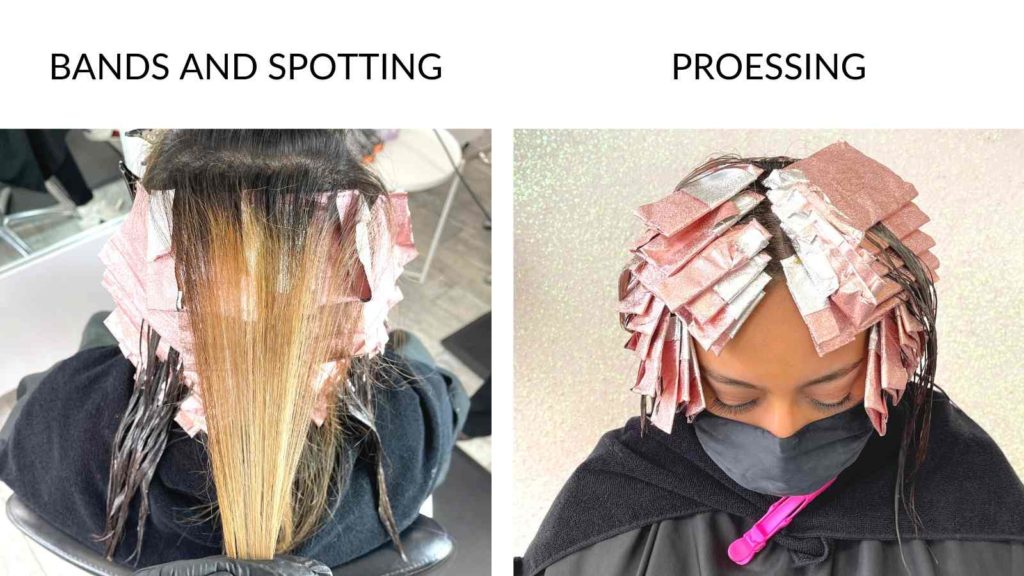
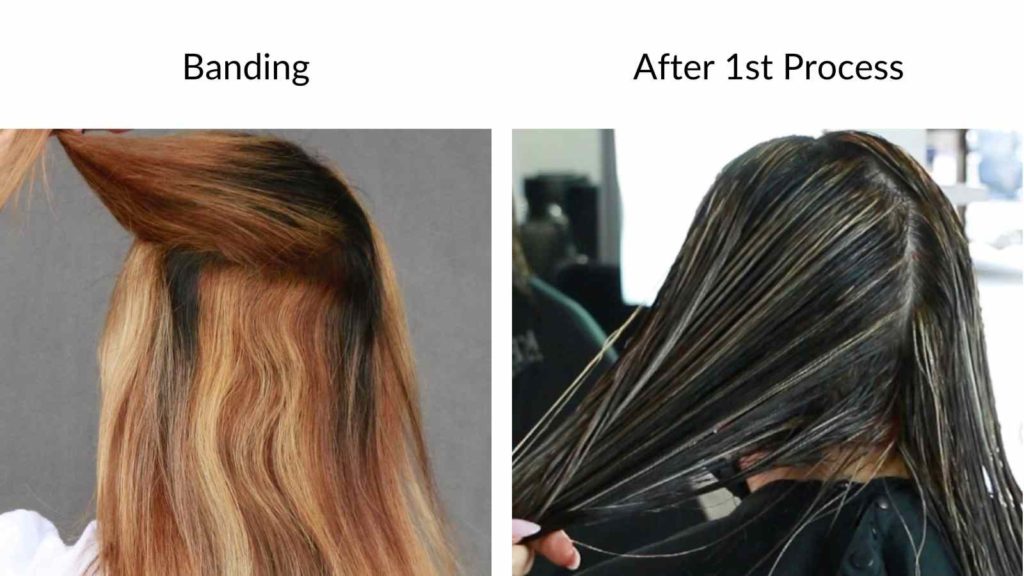
My lovely client definitely went a little crazy with the lightener and ended up with a lot of banding. Her end goal was to create a dimensional look, but she wanted a bright pink color for summer. Our perfect solution? A rose copper color!
The easiest ways to get a seamless look when color correcting is by dealing with each problem step by step.
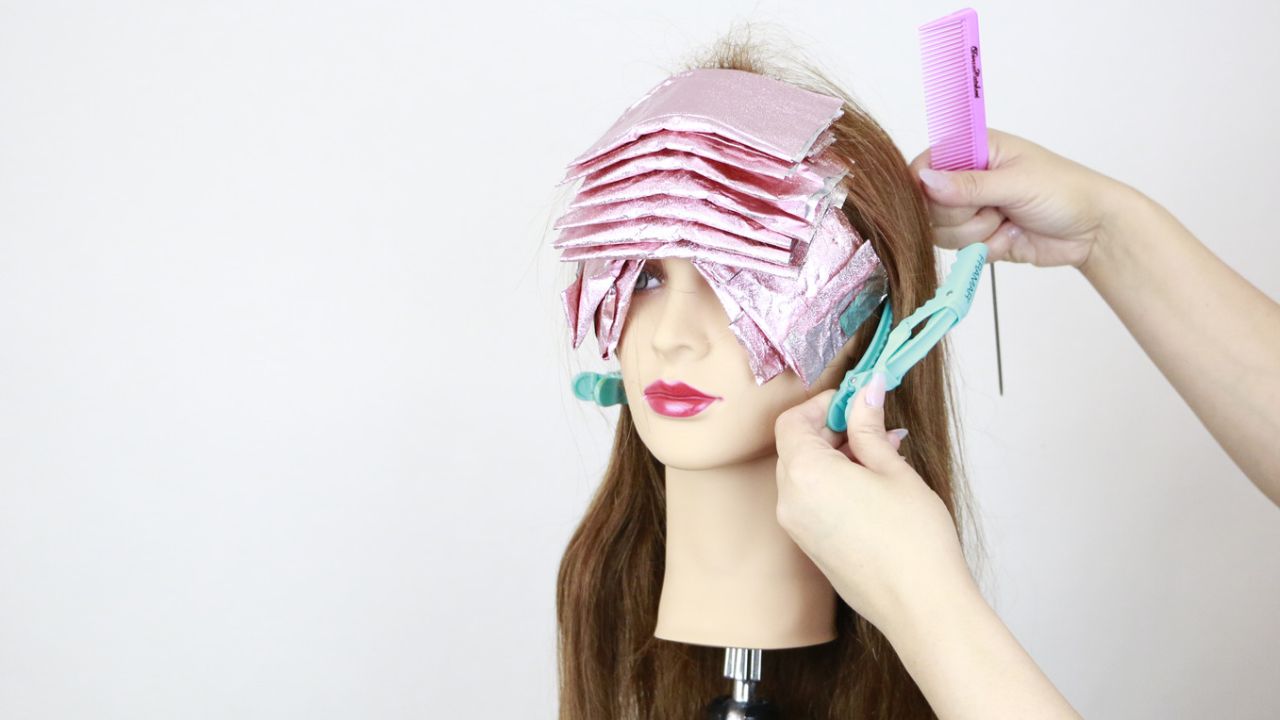
I first went in with some highlights to break up her at-home blonding with beyond bond lightner and some lowlights. By incorporating both highlights and lowlights it will not only break up the bands she had before, but it will also create lots of dimension.
What is the difference between highlights and lowlights?
Highlights vs lowlights… what’s the difference?
Highlights are generally lighter than your natural base color and are used to create pops of or overall brightness in your hair. Also, highlights do not technically need to be blonde, just lighter. In this case, my model’s highlights are pink, but lighter than her natural base!
On the flip side, lowlights are a couple of shades darker than your natural hair color or the highlights, to create depth. The depth in the lowlights are also great to make the highlights seem lighter!
Why I used Kenra Professional Beyond Bond Lightener
In this color correction, I used Kenra Professional Simply Blonde Beyond Bond lightener because of its Dual Bond complex. She had some banding that I had to overlap on, so this lightener is my go to because it is so gentle on the hair.
Another benefit is it can lift up to 9 levels and smooths the outer cuticle!
Hot tips when Color Correcting!
Always have clean and precise sections when color correcting. I always love to use Framar foils and tools because I can create that easy work space and I feel that Framar tools make it 100 times easier when working.
If you love Framar as much as I do, CLICK HERE !
I also want maximum saturation when doing a color correction, so I love to do my final glaze formula on dry hair. It is also important to let it process for at least 20 minutes.
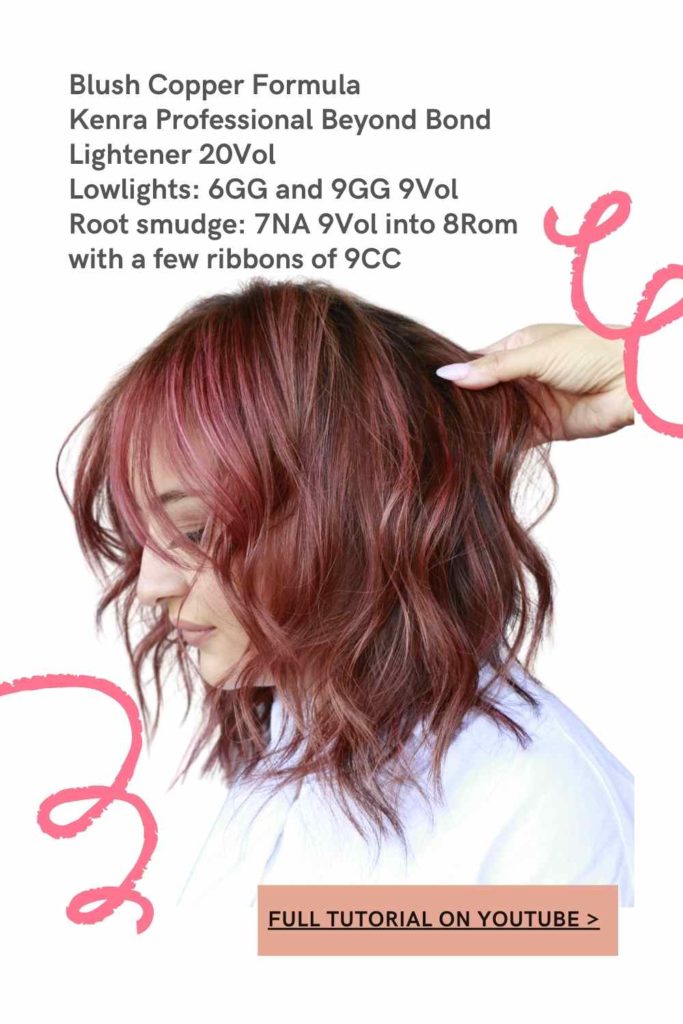
Color correction Final Formula
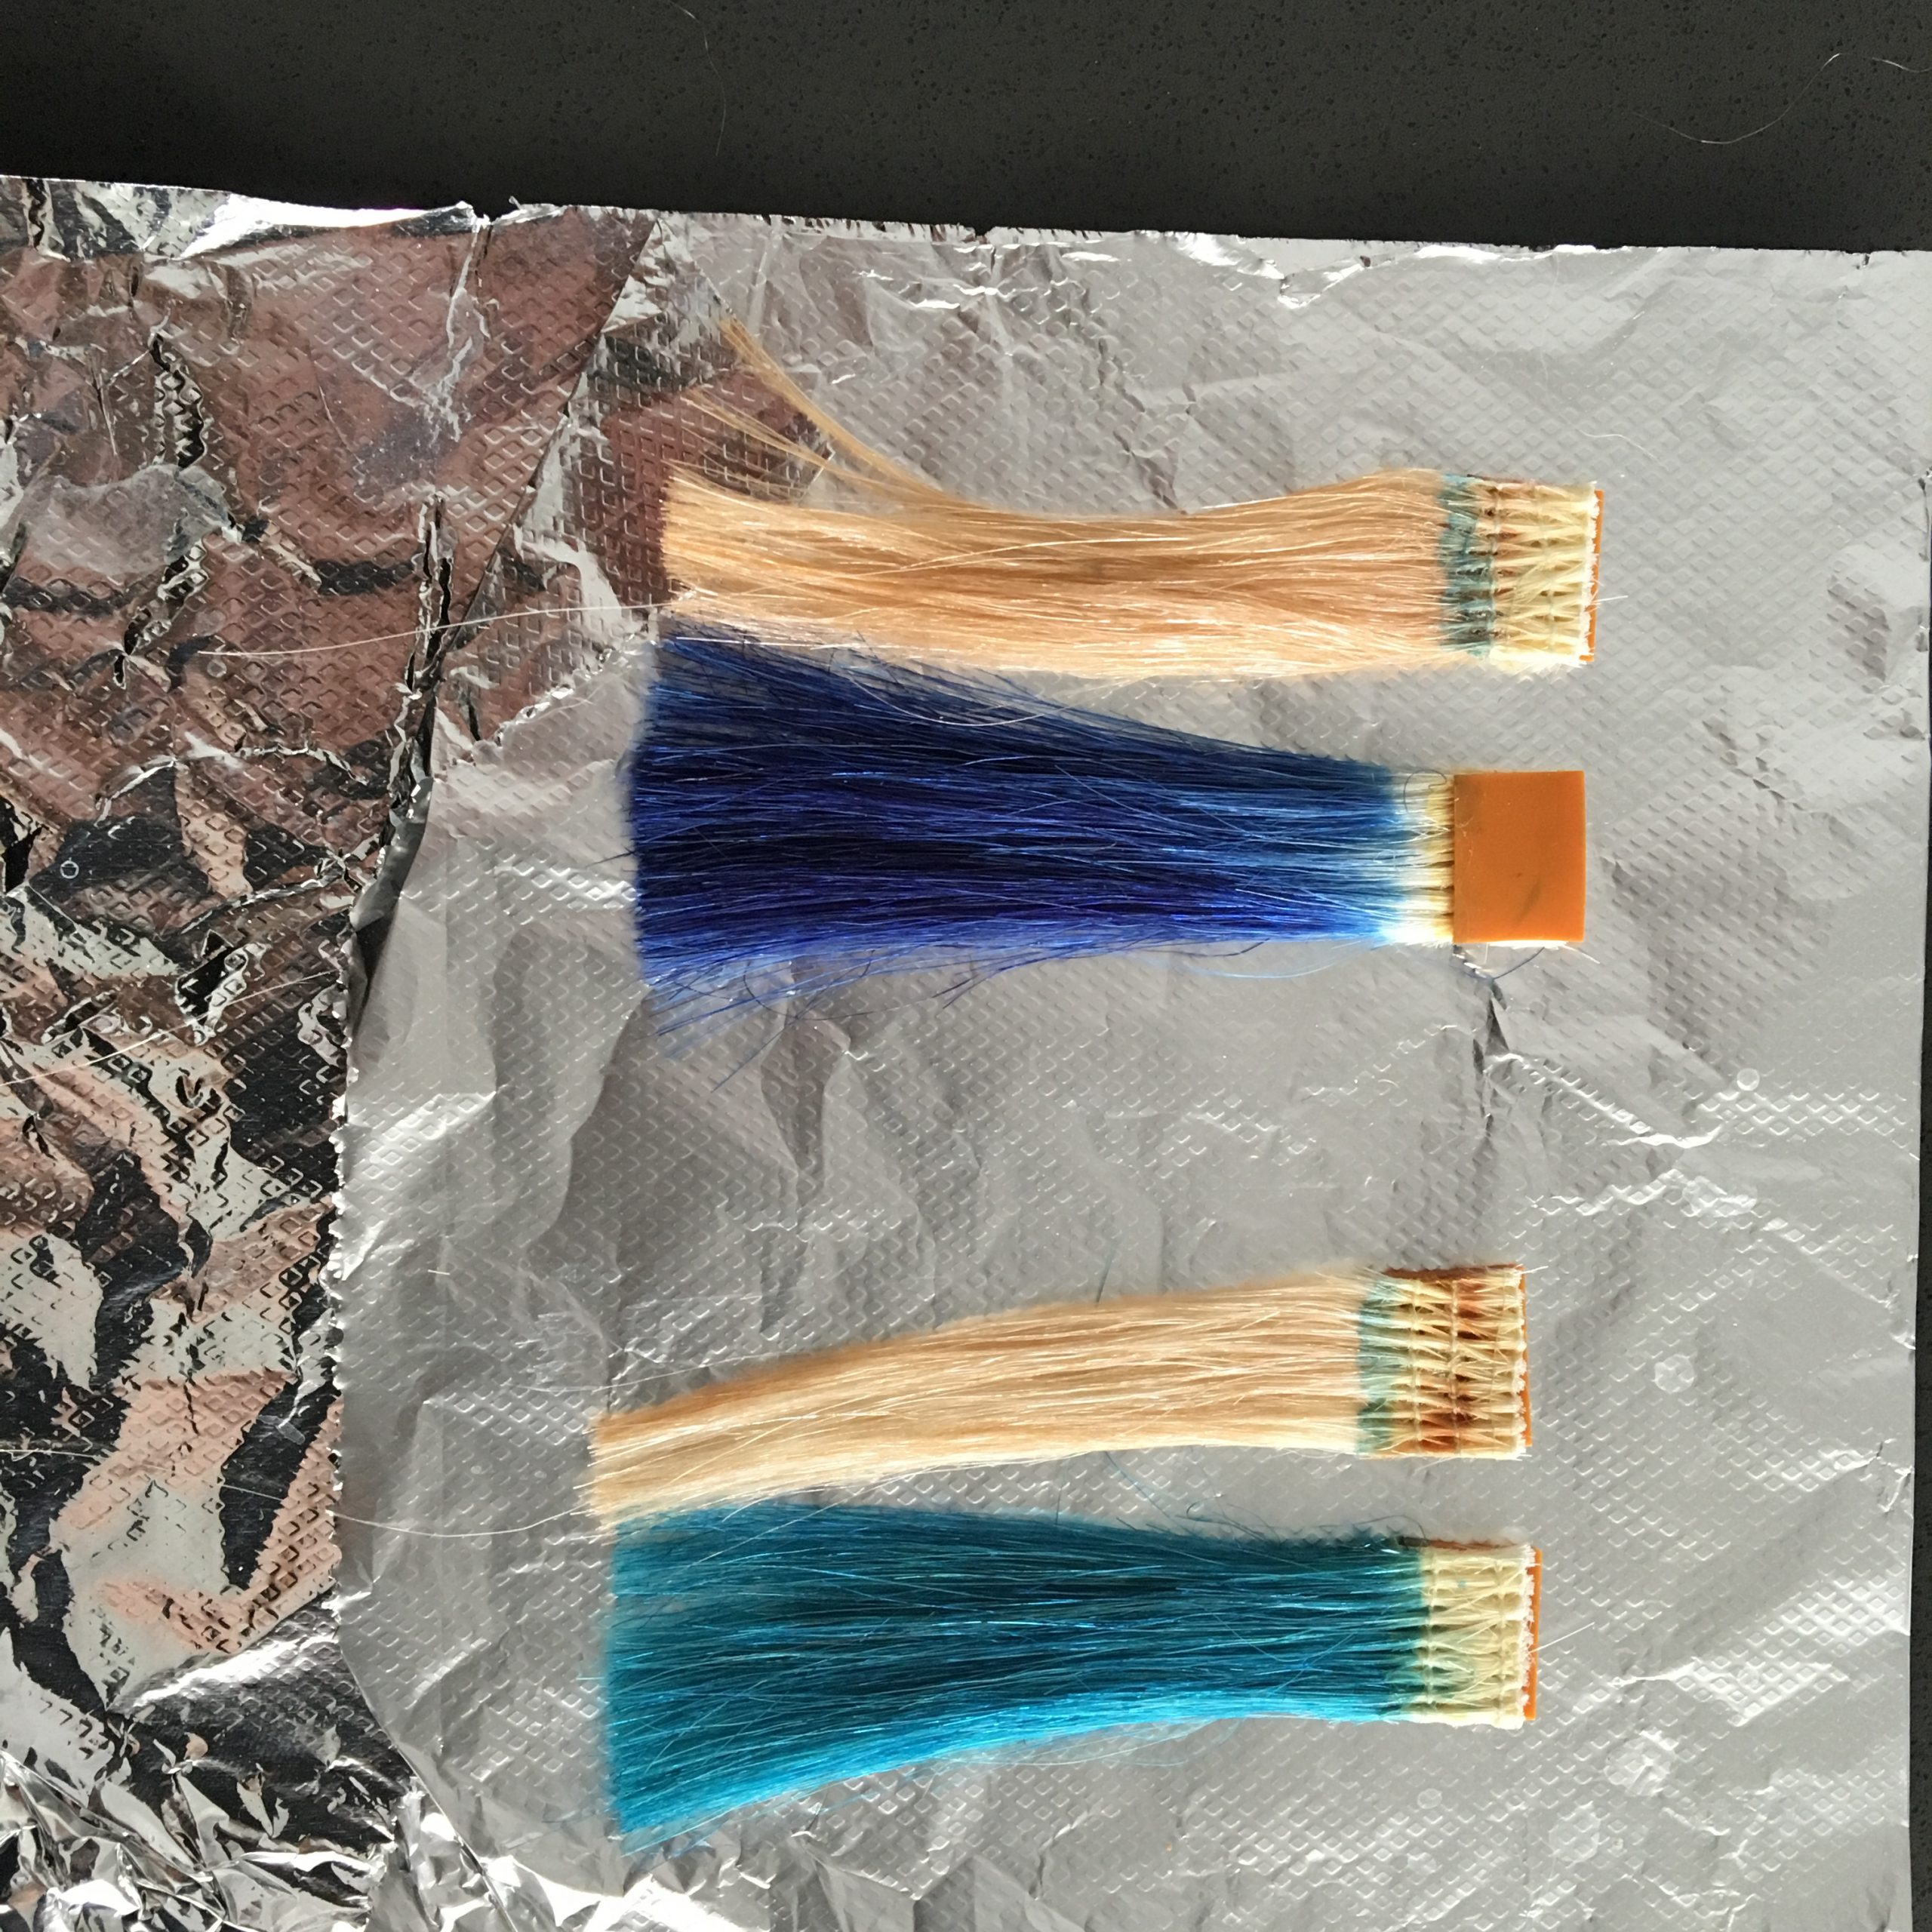
Highlights: Kenra Professional Beyond Bond Lightener with 20 volume developer at a 1:2 mixing ratio
Lowlights: 6GG and 9GG with 9 volume developer.
Root smudge: 7NA
Glaze: 8Rom with a few ribbons of 9CC
WANT TO BE A HAIR MODEL FOR MY UP COMING YOUTUBE?
Love my blogs? Click here for more!
Learn how to create face framing highlights for dark hair with this money piece hair tutorial.
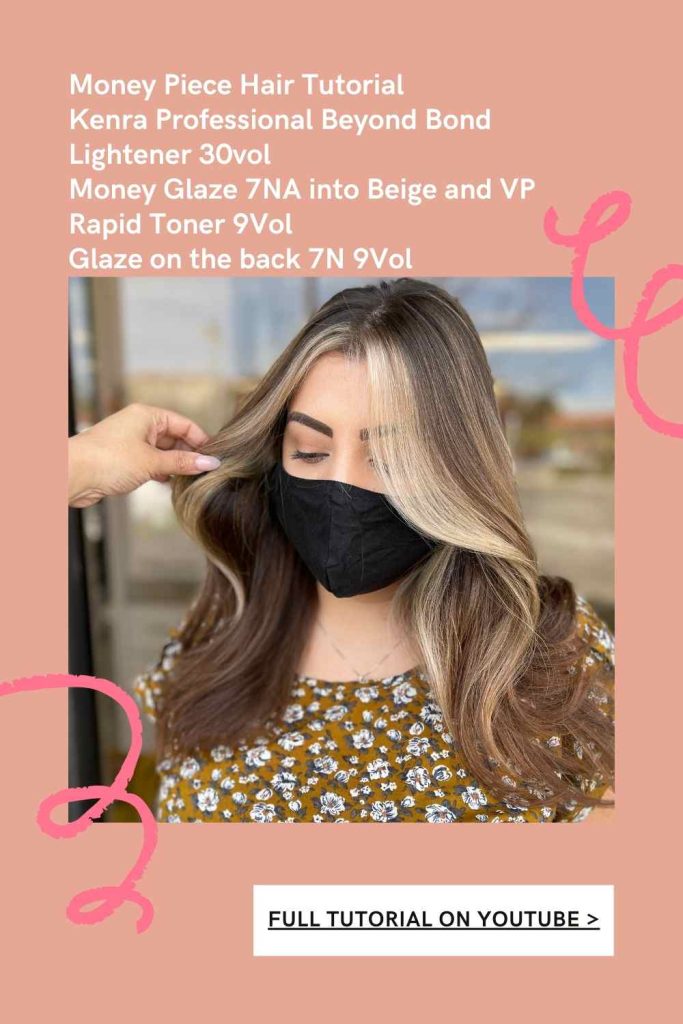
Face framing highlights on dark hair is probably one of my favorite things to do, mostly because of the versatility and high contrast that comes with it. It’s so satisfying and rewarding to see it lift to an even 9, providing the best canvas to do, really anything to that money piece highlight.