


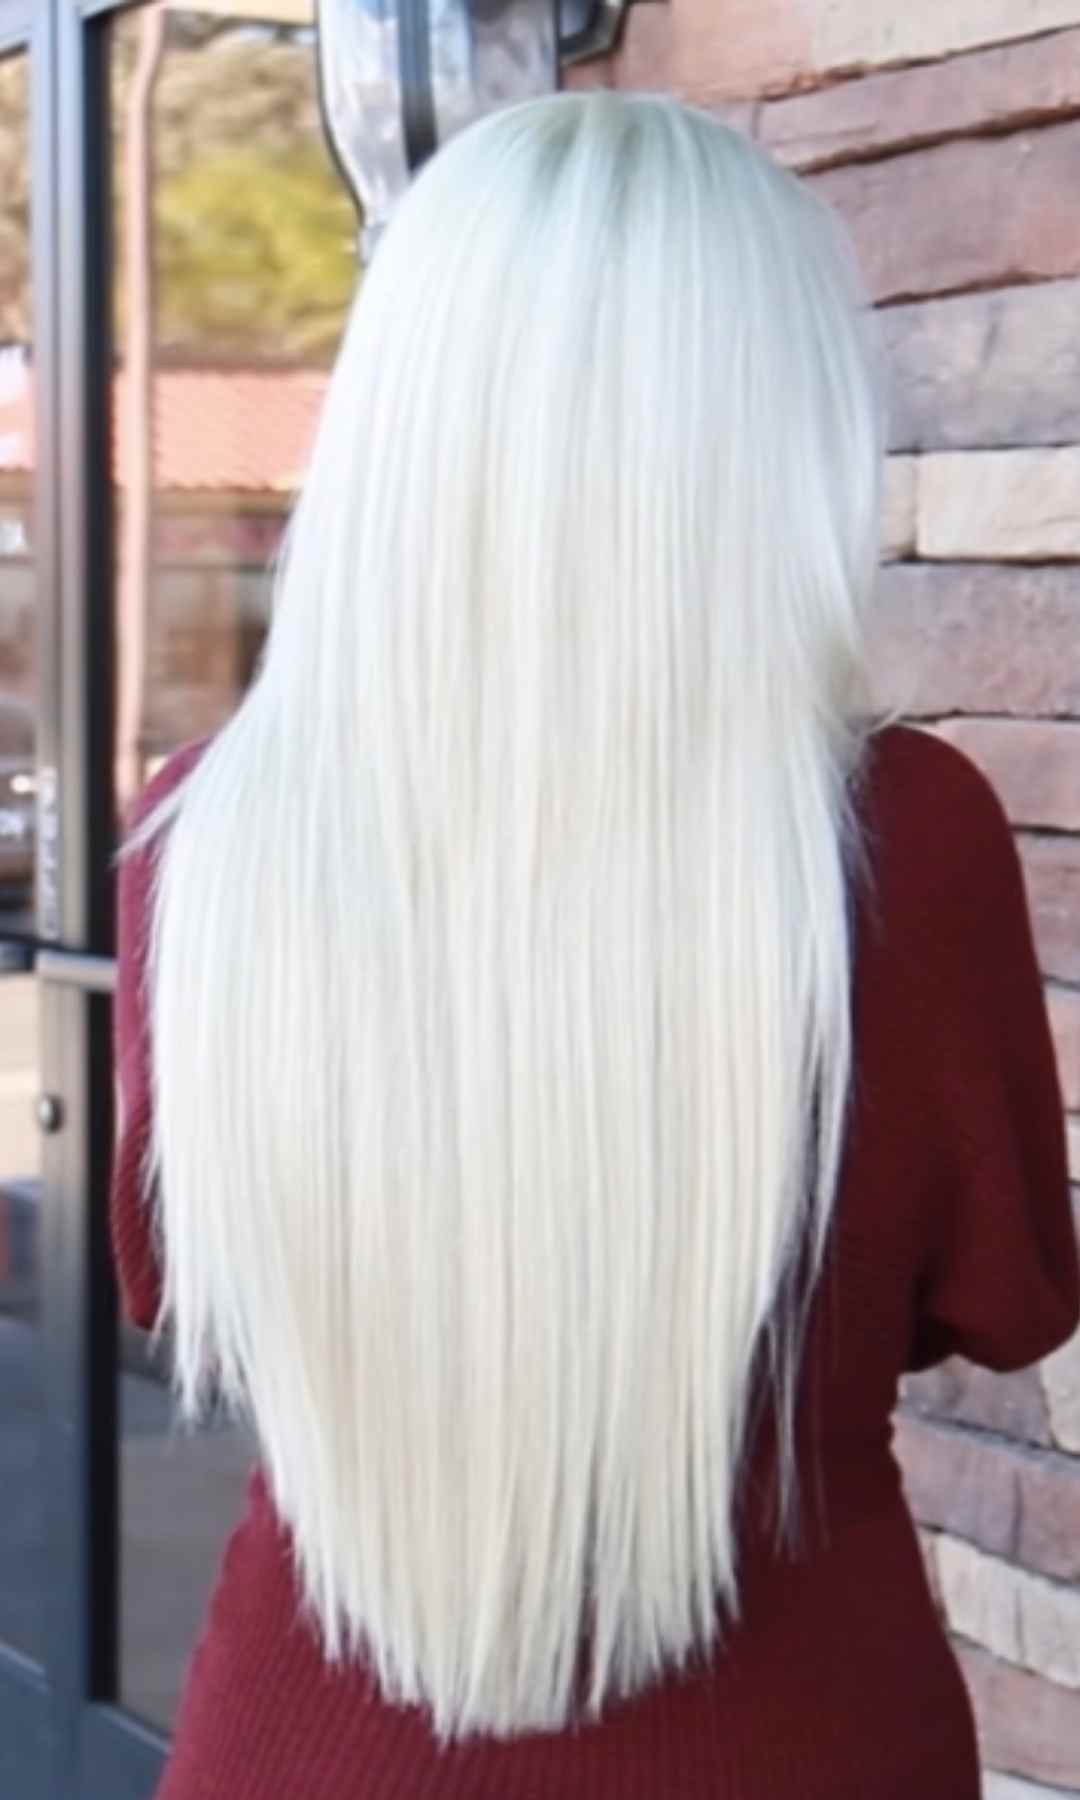
In this MAJOR Color Correction, watch how Lisa and I take black hair to a beautiful white blonde. I share all of my favorite tips to create this beautiful canvas in one session!
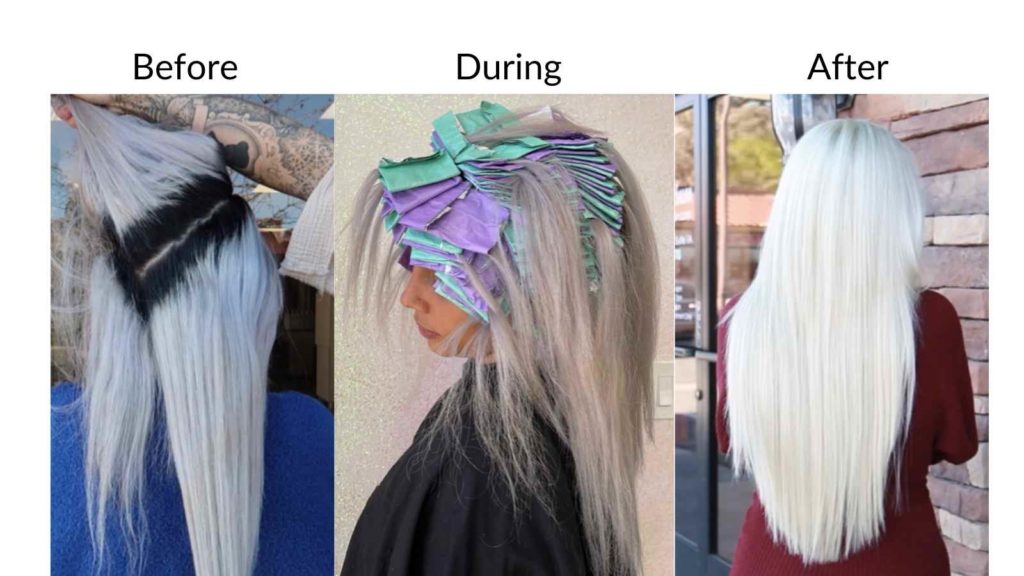
This was probably the most challenging color correction I’ve done because, HOLY ROOTS! She is a natural level ONE and her ends are a ten. Plus, she has bands, on bands, on bands, on bands, and tons of breakage too! In this Color Correction, watch how I take black hair to white blonde. I share all of my favorite tips to create this canvas in one session!
The overall goal was to achieve a white blonde without the blue/violet tone. I’d say we achieved that and more in just one sitting! A major game-changer when it comes to this correction was the use of the K18 system. Not only does this system help repair the hair, but it allows a clean and easy lift! For more information on the K18 system, keep reading!
The Process + My Favorite Tips!
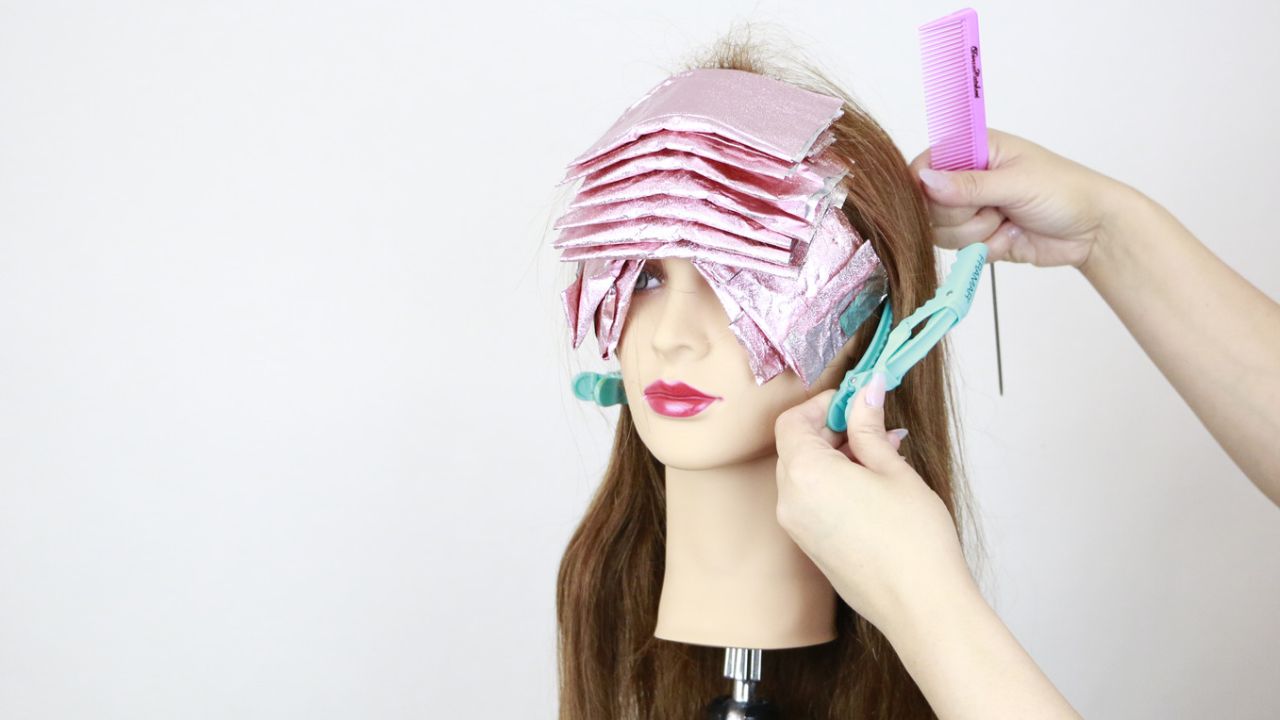
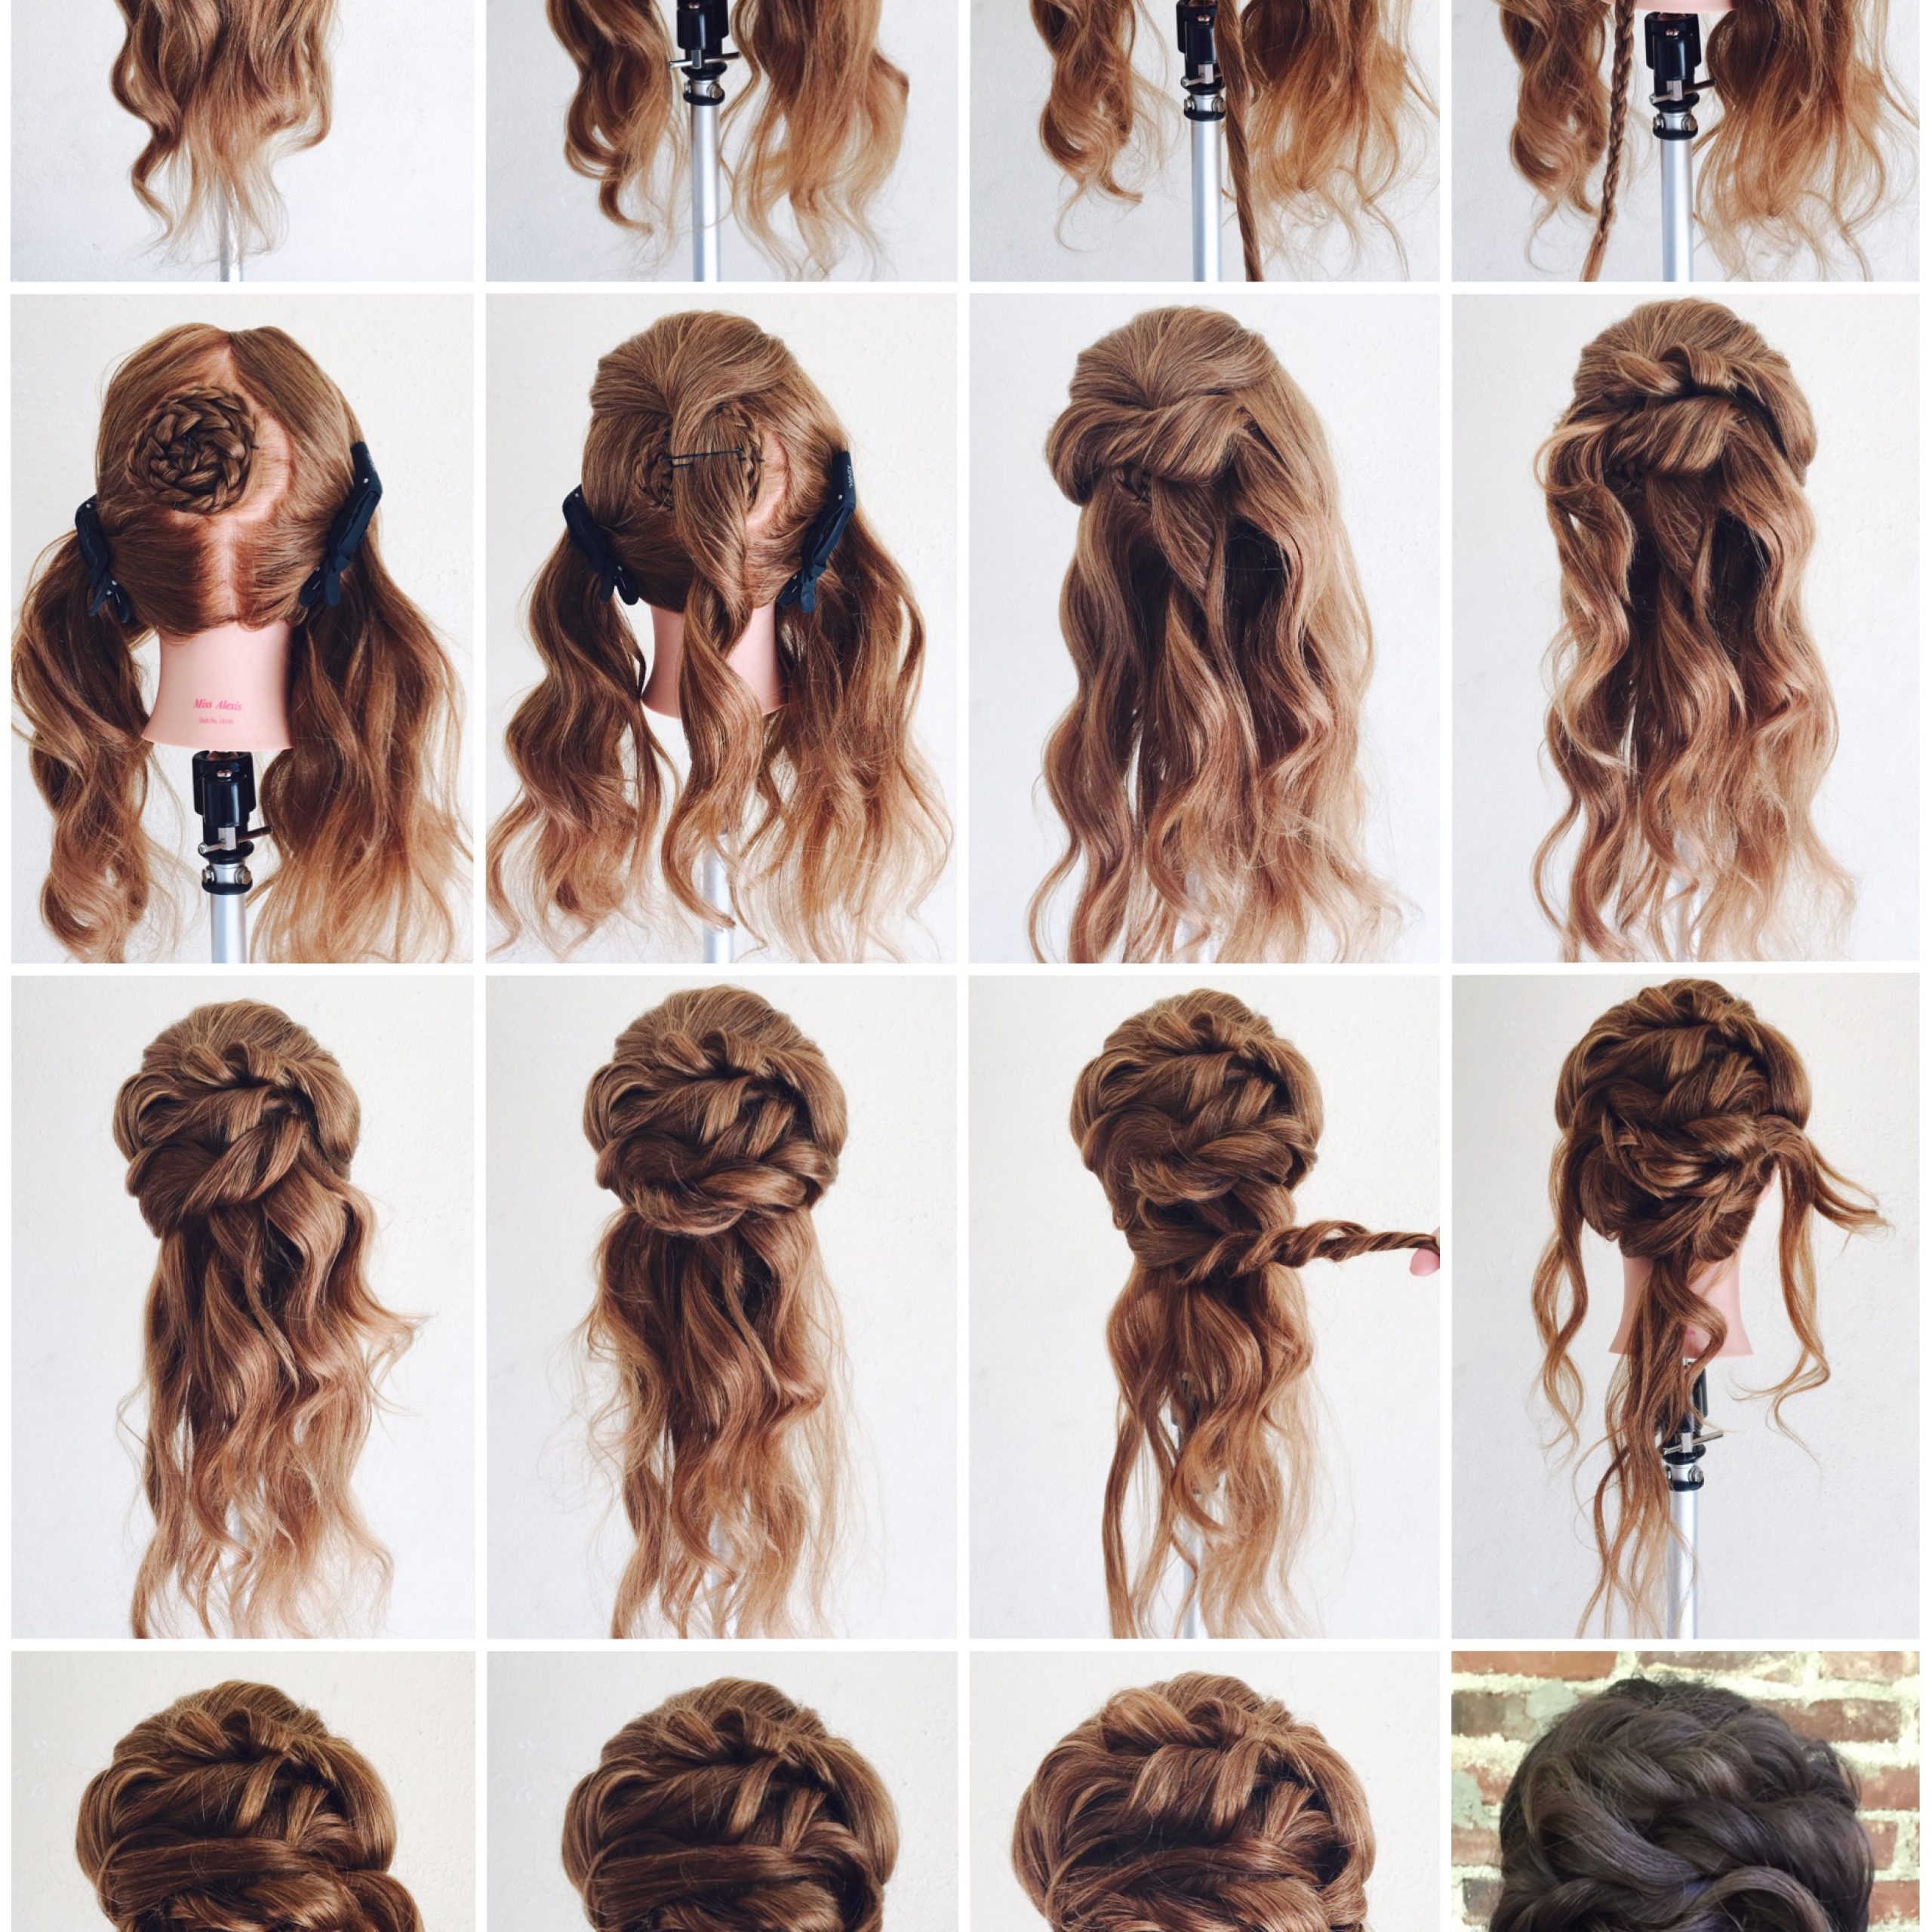
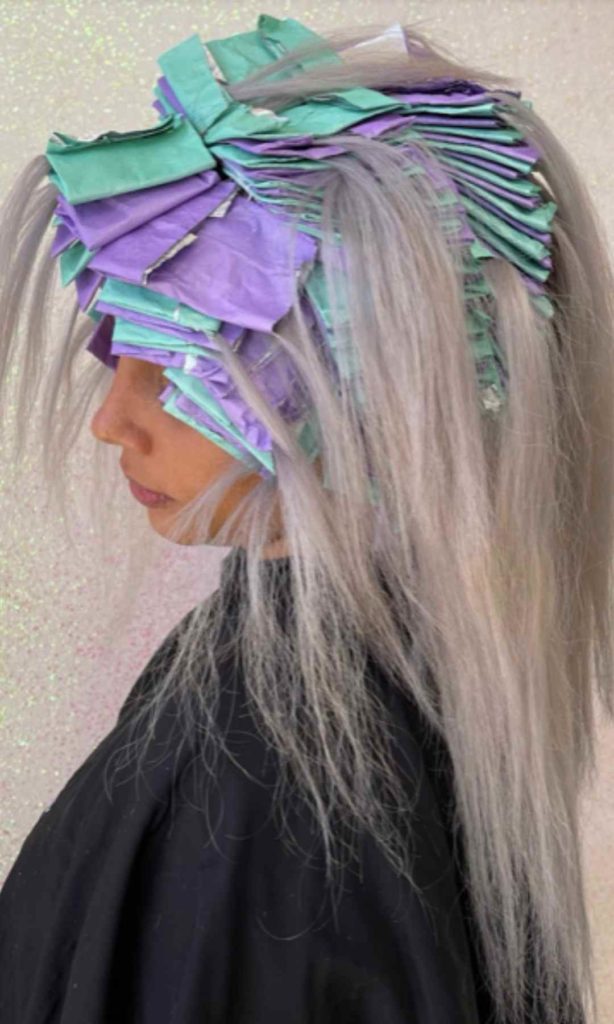
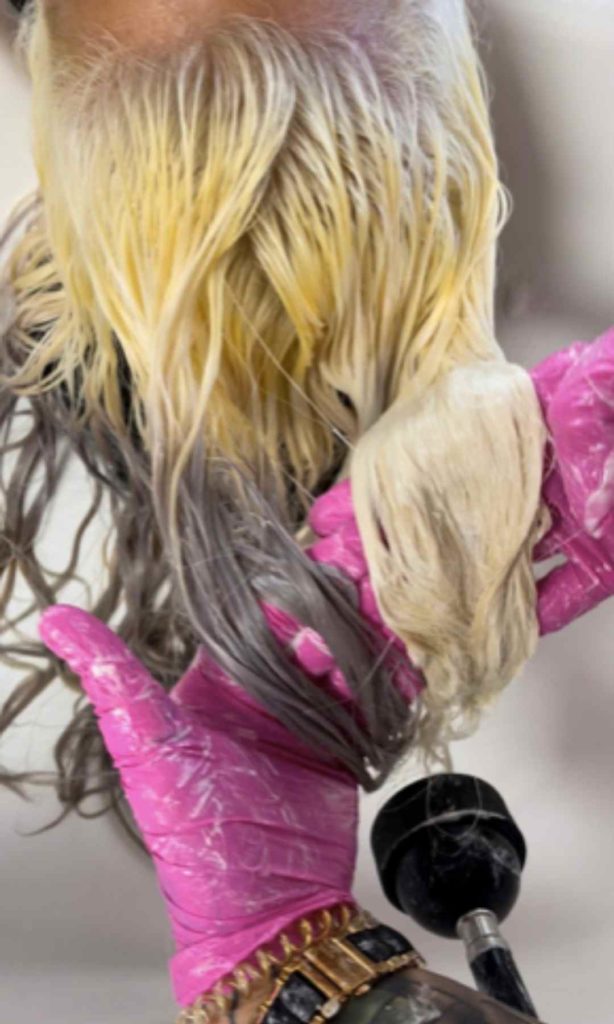
When working with a platinum card hair technique, you have to be super careful. You can see her hair has some previous damage, so going low and slow is the way to go (see what I did there). Lisa and I (check out her work on Instagram @artistryoflisag) decided to do 6 sections instead of your typical 4. The reason behind that is her hairline is super fragile. We wanted it to process last because it can process quickly and we did not want to create more damage.
You want to keep in mind when doing a platinum card hair technique that starting in the back is ideal. This is so when the back is done processing, you can easily rinse it out. You do not have to wait for everything to finish processing before you rinse! It creates an easier working space as well as less damage to the hair.
Because there were two people doing this correction, we decided to do diagonal back sectioning. This was so we don’t bump into each other, but traditionally you would just do horizontal sections. When lifting 10 levels in one go, you must take fine sections. It is ideal to see through the section. We did 1/8th subsections.
You also need to make sure to use a strong enough lightener that will give you enough lift. We decided to go in with Kenra Professional Blue Powder lightener because it is my favorite powerlifter. I knew it was going to help me achieve the maximum amount of lift in the shortest amount of time.
When lifting 10 levels, you also need the proper amount of incubation in your foils. My favorite foils to use are always Framar Foils because they have the perfect size for me. Plus, they are always so stinking cute! Anyways, when you are lifting that many levels, always fold your foils. This will create a clean working space as well as keep the heat in, therefore lifting the hair faster. If you leave the foil open-ended, it can dry out and the lightener will stop working.
SHOP FRAMAR FOILS HERE!
Another tip is when you are doing a major color correction like this one, only mix one 1 ounce bowl at a time. After 15-20 minutes, the power of the lightener starts to fade. By mixing up a new batch every couple of minutes, it will help the processing time and lift your hair a lot quicker.
Using the brand new Framar Bleach Blender Gloves, we removed the underneath foils that were ready. See how much easier it was to remove it there versus up top! It lifted to a beautiful level 10, so we started applying to the roots. The roots process a lot faster because of the heat from the scalp, so that is why you apply the roots last. Make sure you are constantly doing an elasticity test.
When doing a transformation on a client you have never done before, you need to take your time and do all of the steps. As we rinsed the top, we saw it wasn’t as light as maybe it could have been, so we went in with another round of lighter on the places that needed a little extra bump. We also went in on the ends with No Ammonia Lightener and 10 volume developer to remove old toner. It quickly did the job, but we still had to be super careful because her hair is so fragile.
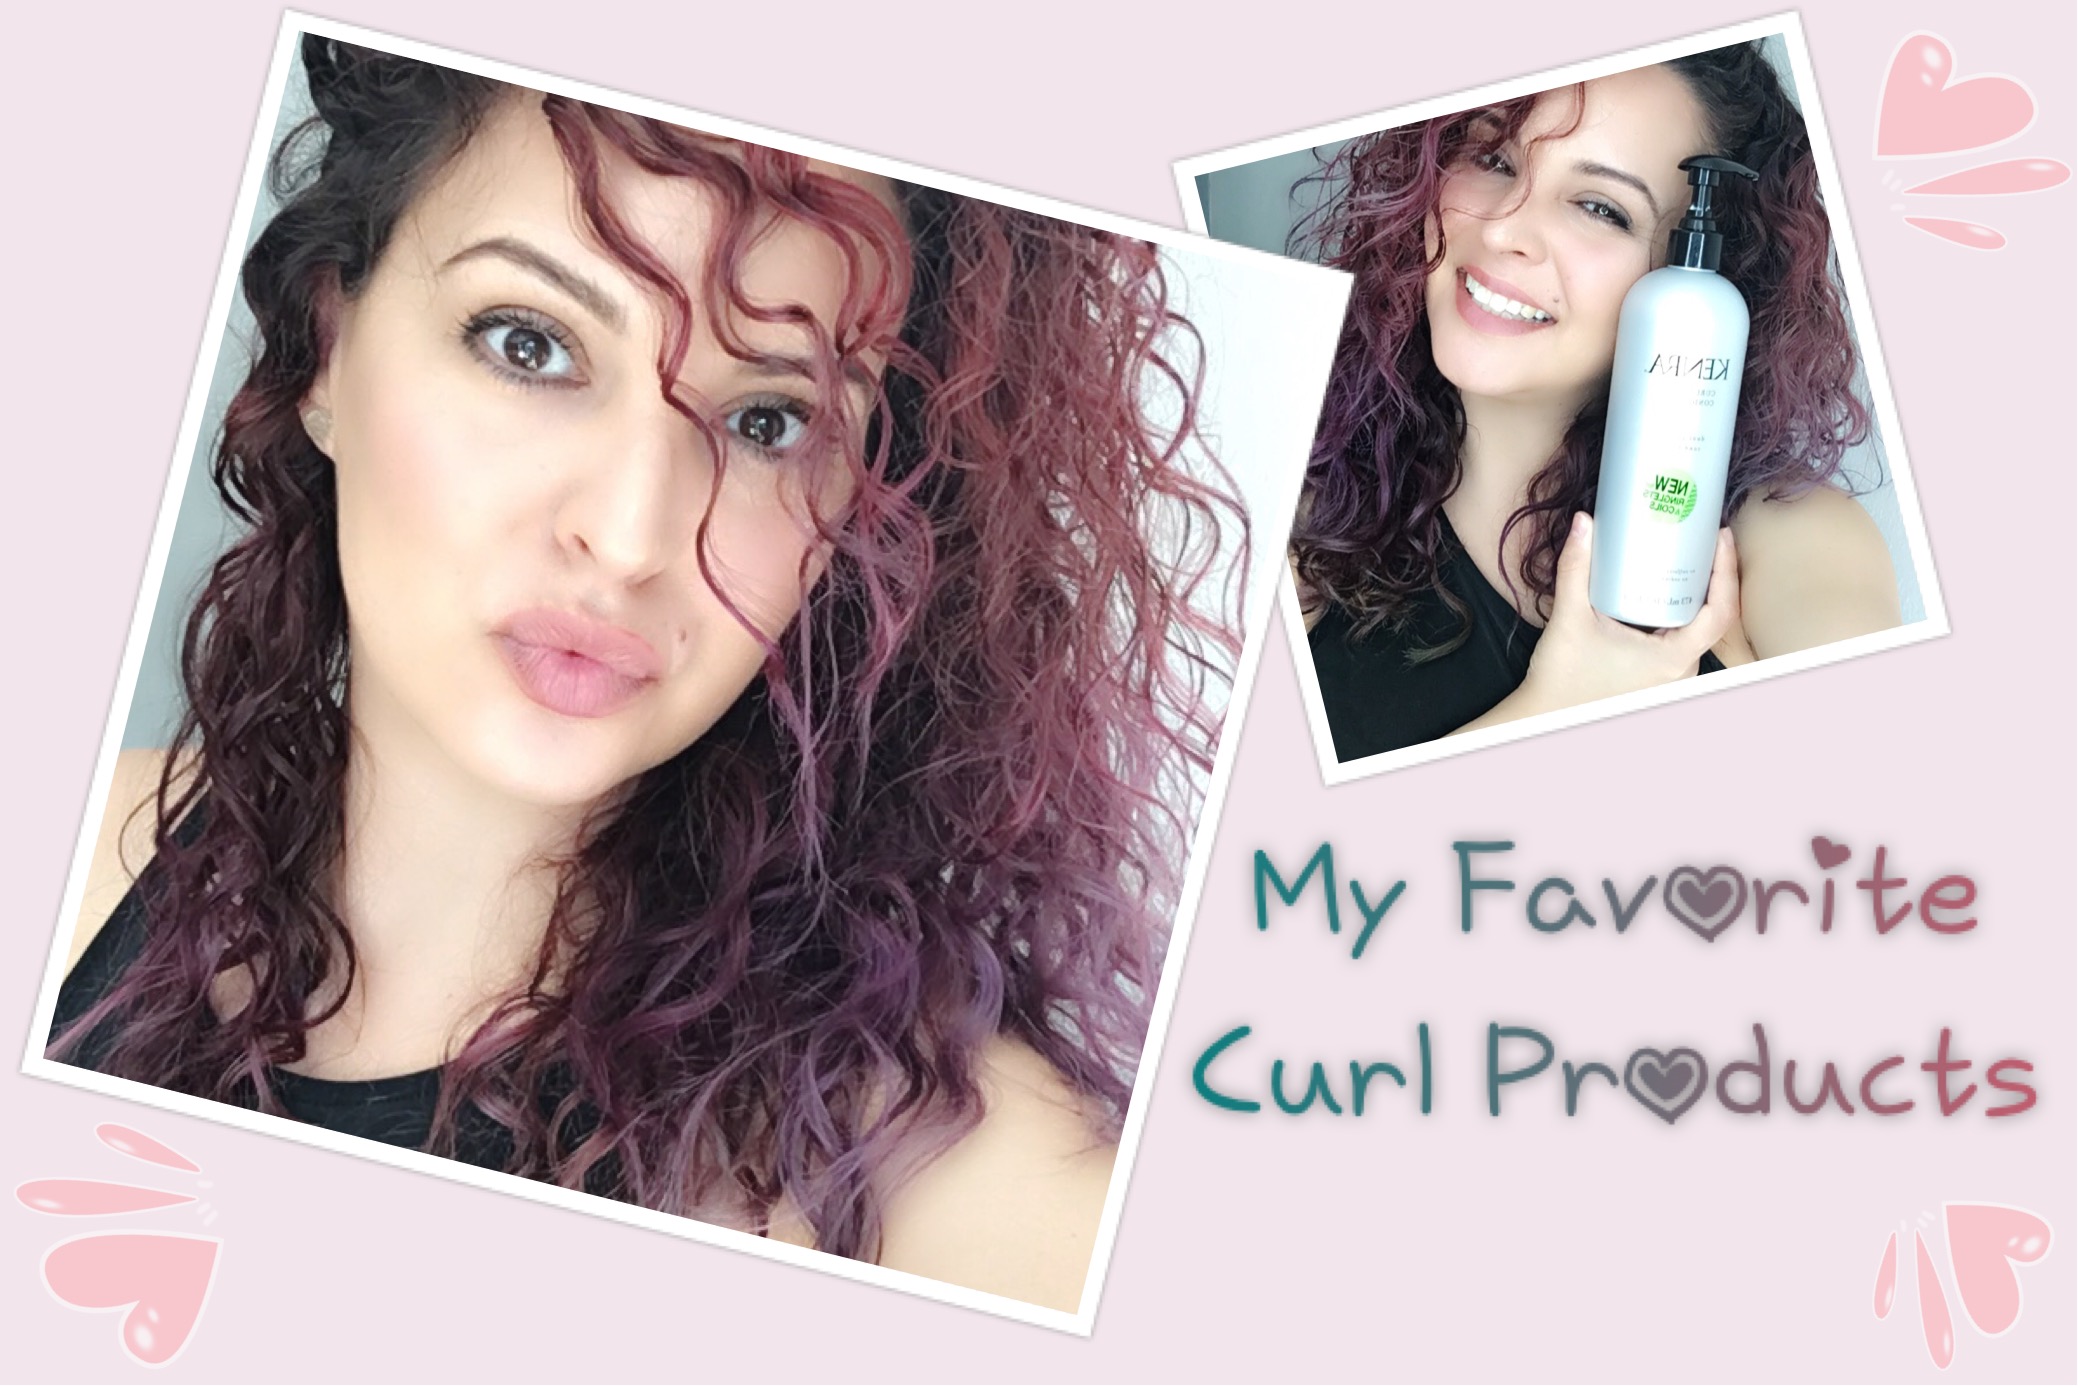
For her toner, we went in with 10A, Diamond Frost, and a little bit of 10 SM for some added depth. This is one of my favorite formulas when wanting to go white blonde because it reflects the light super pretty. PS, I think Diamond Frost is super underrated because it is a sheer tone that allows the natural pigments to shine through while giving a cool reflect.
Platinum Retouch Maintenance
Platinum card applications require a lot of maintenance. If your client is not willing to come back every 4-5 weeks to maintain the retouch, they should not be getting this type of application. The reason behind this is that once the hair gets too long away from the scalp, the heat the head emits is no longer strong enough. In result, it will not get light enough and it will create bands.
Then, you will have to do this whole application again and it will cost a lot for the client and it will take a lot of time for you. If they maintain the 4-5 week appointment it will be a lot less damaging to their hair and their bank account. Make sure to consult with the client before you choose this application for them.
Watch how to maintain a Bleach and tone Application here!
How to know what lightener to choose
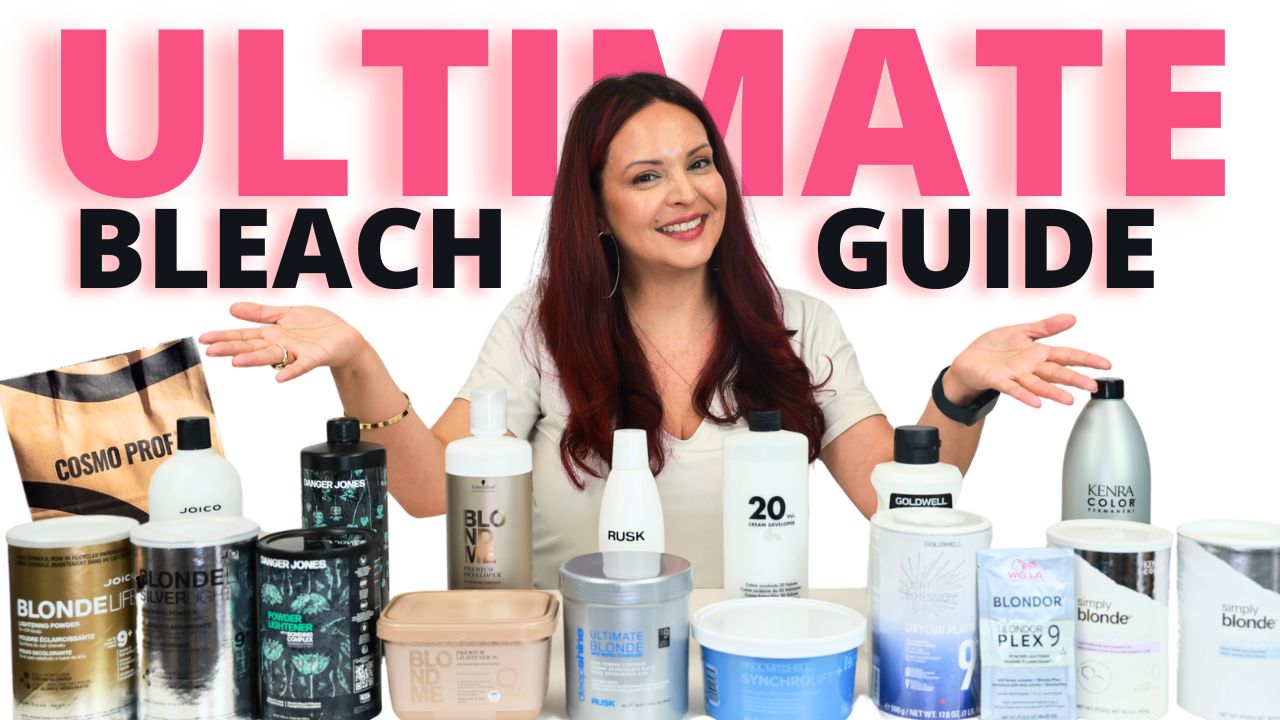
I love using Kenra for all of my hair needs (have you noticed?), so it comes as no surprise that I love their lightener as well. However, they have an abundance of different lighteners that are all used for different things.
Blue powder– Obviously one of my favorites. This is my go-to power lifter when I just need to get the job done. It lifts up to 8 levels and it has a blue base, therefore it has a slight toning ability when lifting. I just love this stuff! CLICK HERE to watch the blue powder in action!
No Ammonia Lightener- This stuff is the bomb when wanting a gentle lift. True to its name, the No-Ammonia lightener is great for wanting more manageable lift in a easy way. This is why for this transformation it was perfect for slightly shifting the hair to remove the old toner, but not give us tons of lift.
Beyond Bond Lightener- Does your client want to go blonde but you don’t feel comfortable putting a strong lightener on her? Beyond Bond is your answer. It has inner and outer cuticle bonding in the lightener to ensure a gentle lift. The Dual bond complex of this lightener is the reason I often use it. CLICK HERE to watch Beyond Bond in action!
Clay Lightener- This lightener is perfect for just simple pops of blonde, no incubation necessary! It creates a shell around the hair so there is no transfer and can lift up to 7 levels! CLICK HERE to watch the clay lightener in action! This is more for a balayage type of look, not for major color corrections such as these.
Transparent Lightener- Can someone say color correction? This lightener lives up to its name, and it is transparent. Therefore, you can see what is going on and it is perfect for lifting color out! CLICK HERE to watch the Transparent lightener in action!
Benefits of K18
This product is AMAZING! So, not only does it work in literally 4 minutes, but it totally changes the way your end result looks. K18 helps restore and repair the natural keratin Bonds from lightener, color, heat, and other chemical services. As stated on the K18 website, it is, “Clinically proven to repair & reverse damage from chemical services and thermal styling– in 4 minutes”.
It also makes the hair super soft, shiny, and bouncy. K18 vastly improves the strength of the hair noticeably. However, this is not a one-time solution. It is a progressive treatment that takes about 6 times to show visible results. This is a long-lasting solution that continues to rebuild and repair the damaged hair.
CLICK HERE TO BOOK A K18 TREATMENT!
Why should you use a bond builder?
Olaplex, b3 Brazilian Bond Builder snd K18 are created to rebuild and strengthen the bonds of your hair while going through a chemical process. Why should you use it? When lightening or coloring your hair, the bonds break, leaving the hair fragile. If you add a bond builder, it will rebuild your broken bonds, therefore you can leave with your hair strong and healthy, rather than split and delicate.
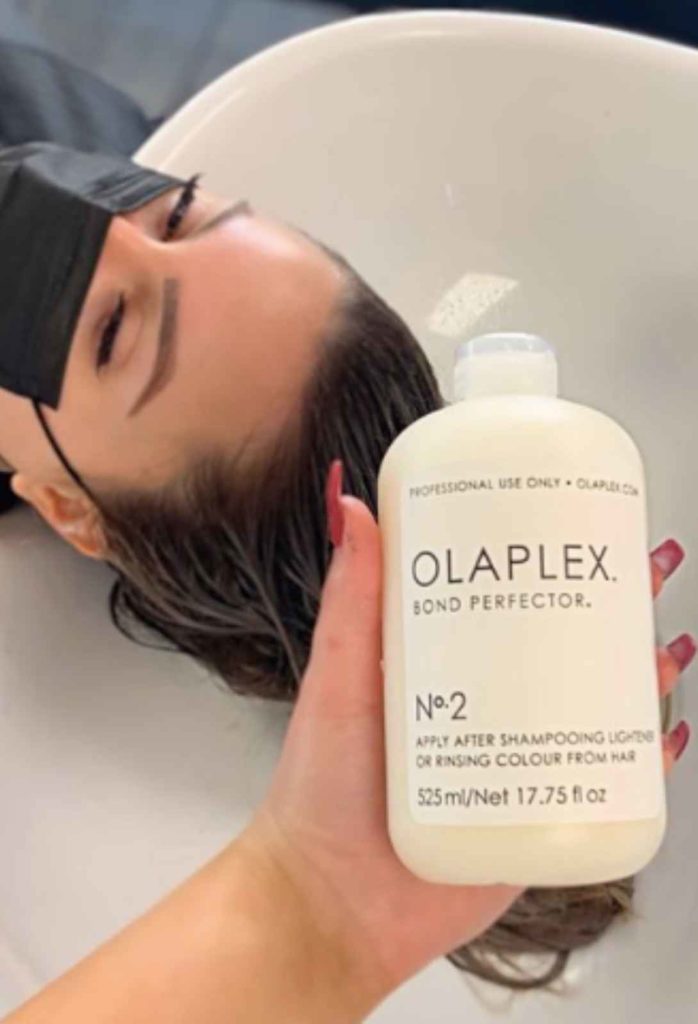
Olaplex helps restore and repair the bonds of the hair while lightning. One of the best things about Olaplex (other than it saving your hair) is that they have a variety of take-home products that help you maintain healthy hair in between salon visits. All Olaplex treatments and products are available for purchase on Rebel Femme Shop.
While many think that b3 is used as a bonder, it’s not. It actually fills and supports the bonds of the hair. Think of it as a permanent gloss for the hair. b3 helps elongate and make your color more vibrant. Therefore it is perfect for fashion colors or if you are wanting to restore some shine into your hair.
As mentioned above, K18 helps repair the damaged bonds of the hair. It closely mimics the natural keratin in your hair, and helps reverse damage in 4 minutes. Click here to read more about K18!
Learn more about why you should use bond builders here!
Formula
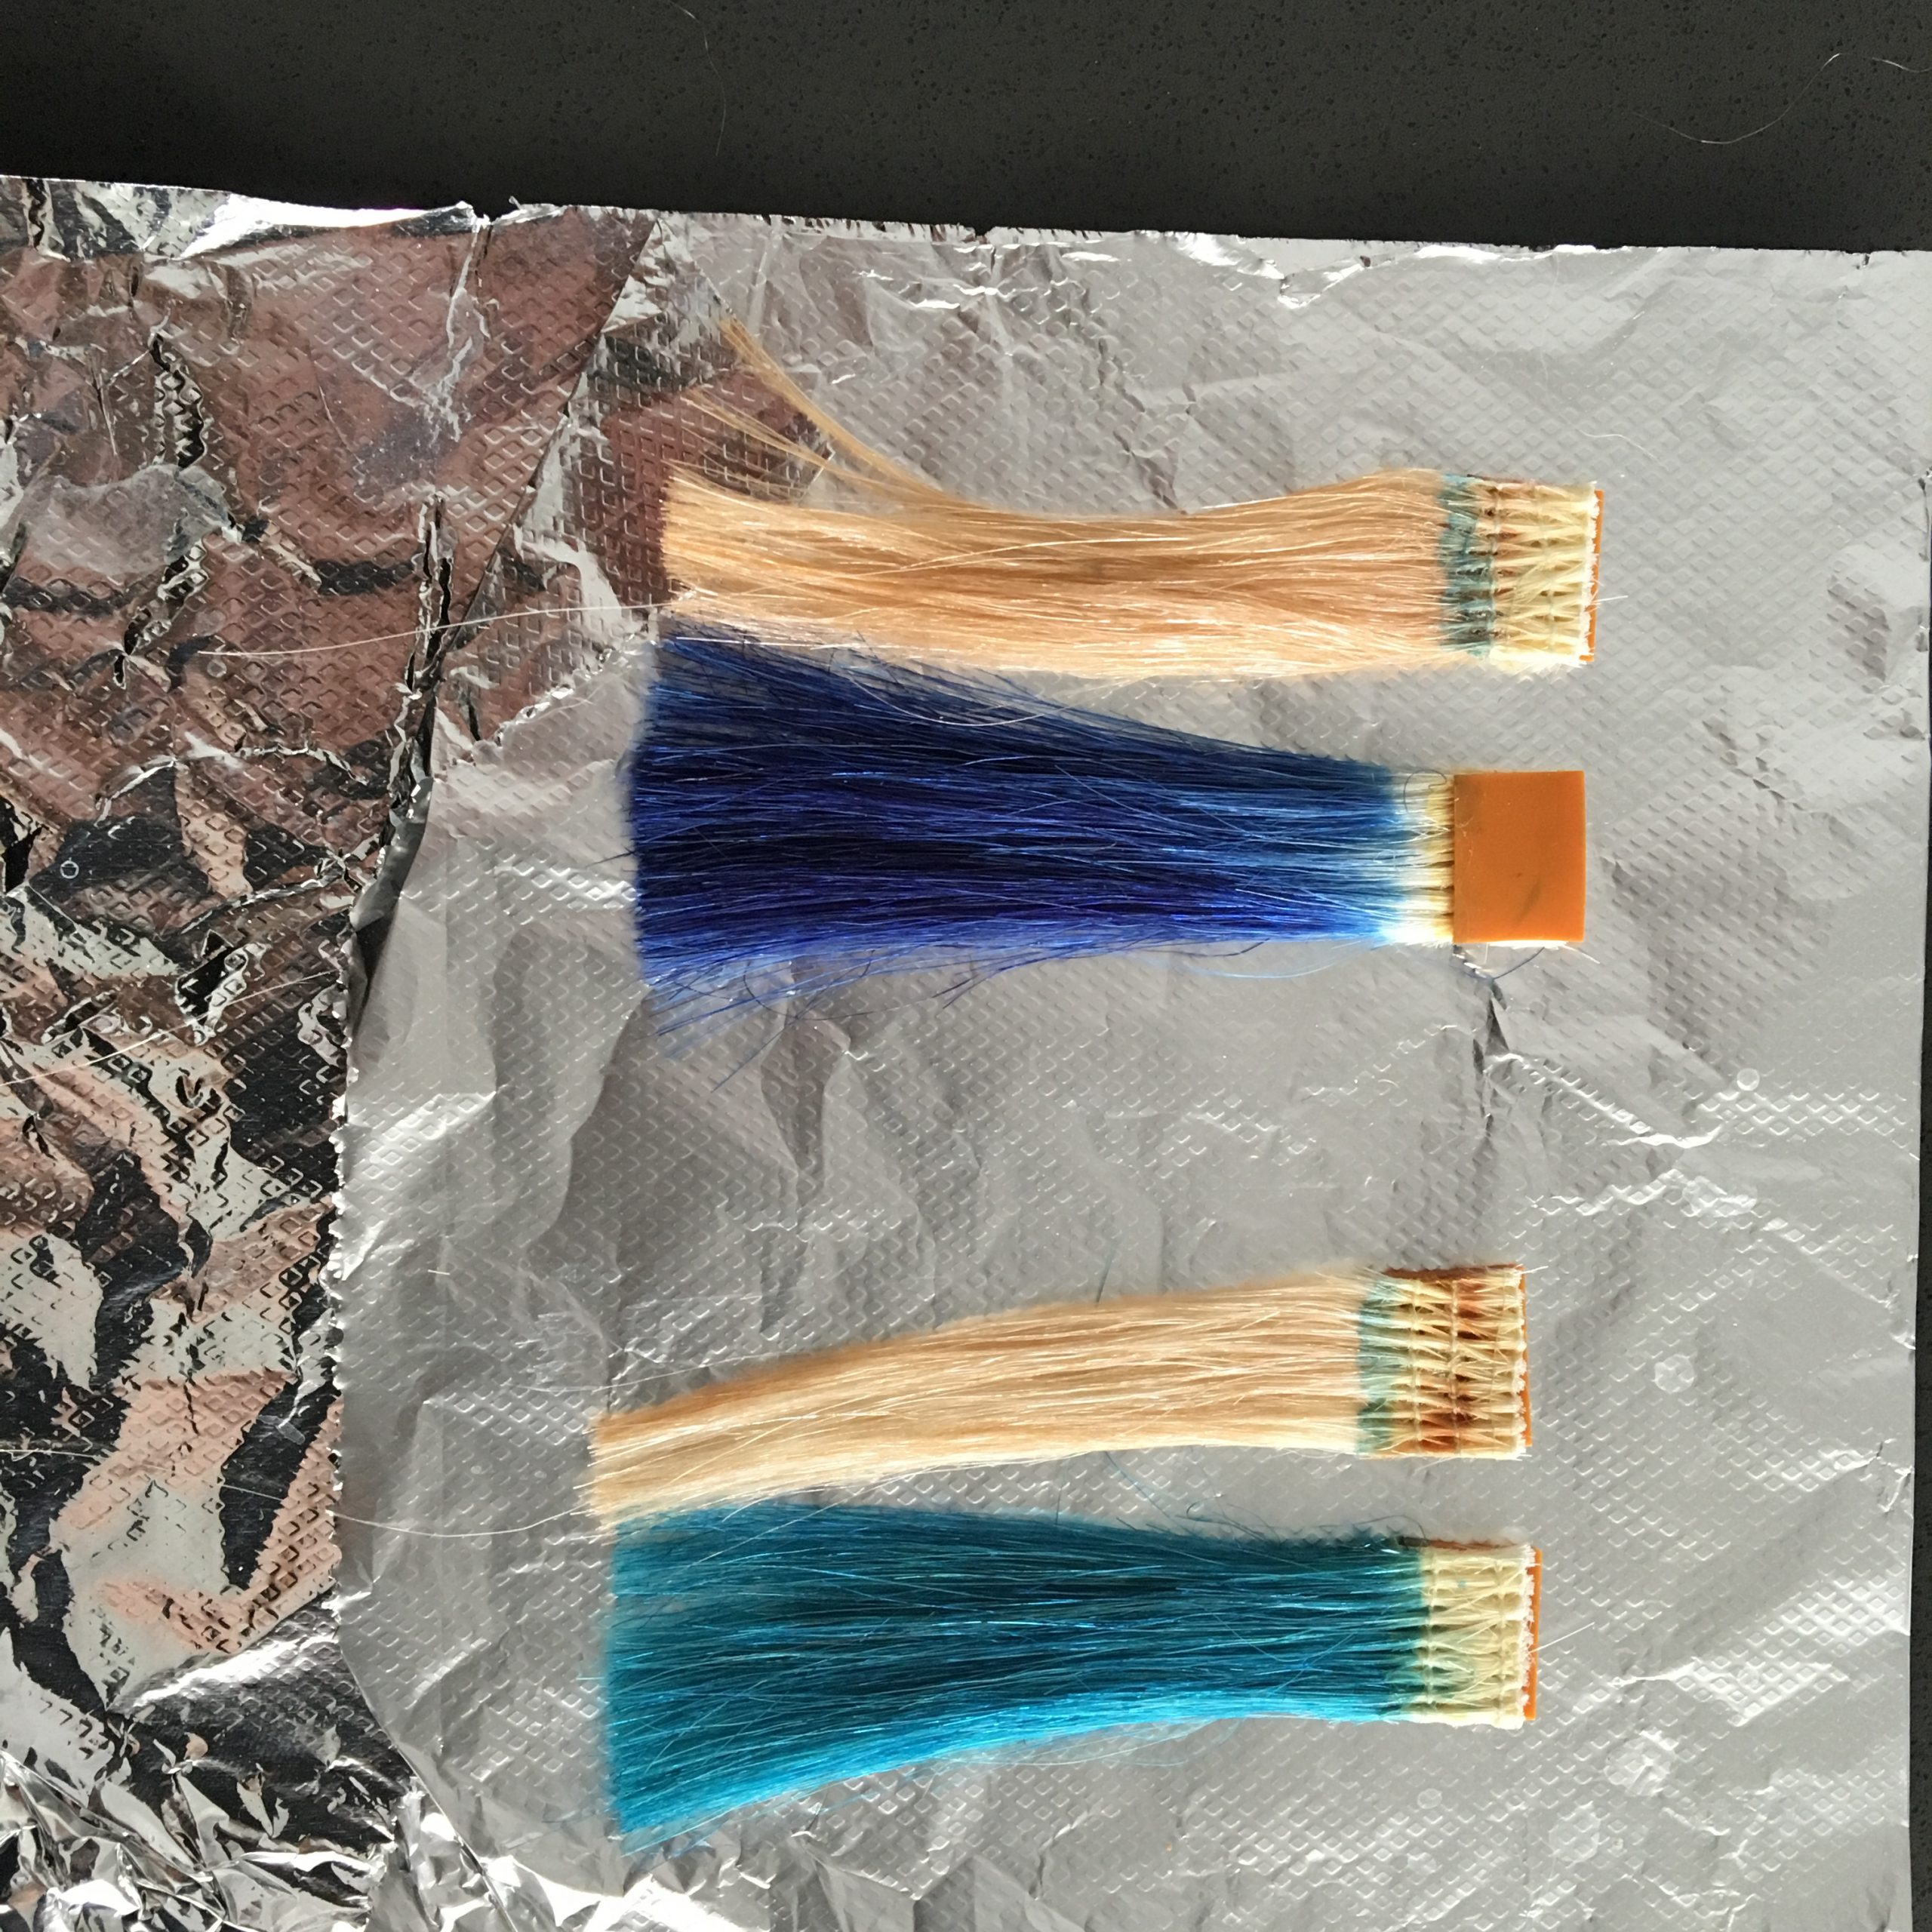
@Kenra Professional 7 bowls of Blue Powder Lightener 20vol
1 bowl of No Ammonia 10vol
Toner – Demi 10A, Diamond Frost, and a ribbon of 10SM
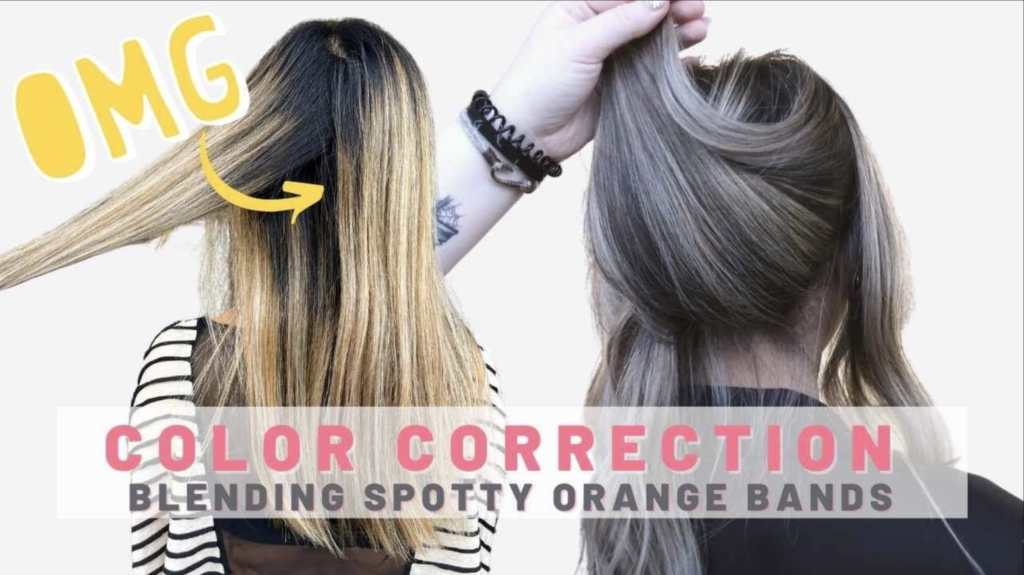
Do you ever have a foiling technique that is so tried and true that it’s just your go-to? Well, I do! In this video, I share my best sectioning for highlights & tips for addressing spottiness and bands for this color correction on blonde hair!